I have being playing around with designing a new router since about the start of July 2009, I had actually started cutting out parts for Joe’s 2006, but so many of the larger parts were too big for my current router and were going to have to be joined, that I stopped cutting and starting thinking about designing the kit that I would have liked to have when I was first searching. So after after 6 weeks of prototyping parts, I started cutting out all of the parts for what I hope will be an easy router that can be sold as a kit that would allow someone to get up and running quickly without having to spend a few months building a router with hand/power tools.
I have already veered of my original intent a bit, but if this thing actually works well, I have plans on simplifying a few areas to make it so I can ship a fairly small kit with the end user supplying a number of standard size pieces of lumber, well see what happens with that.
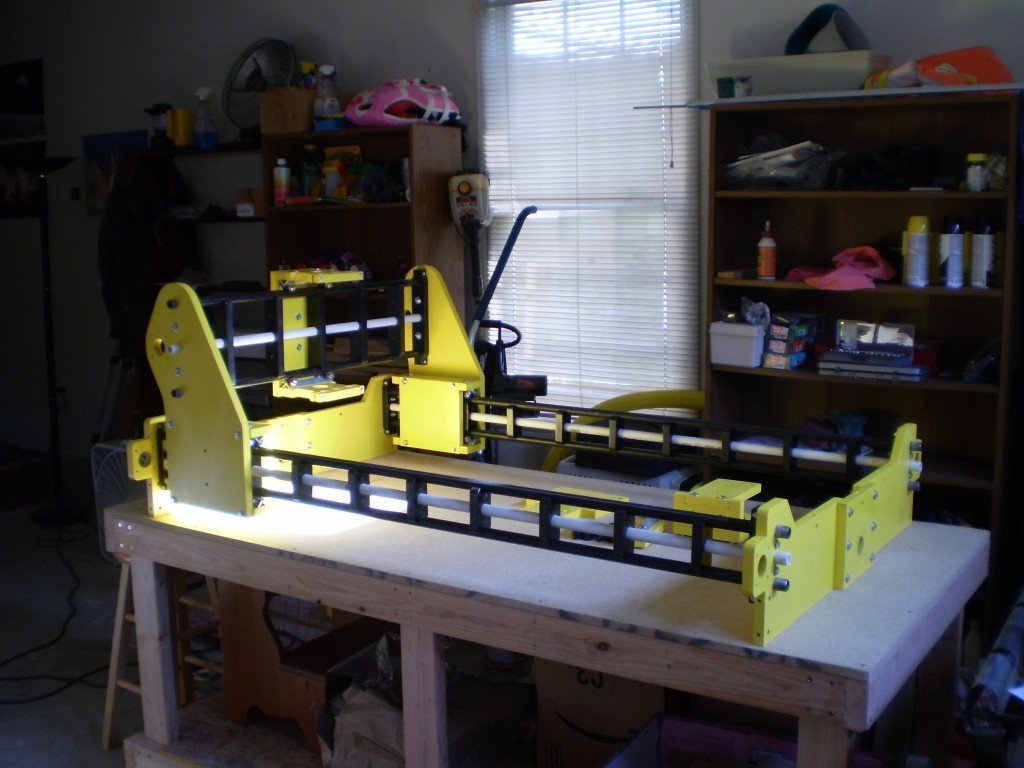
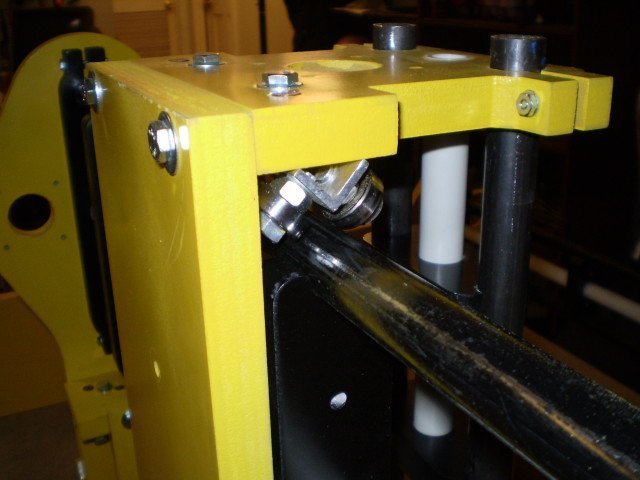
The router is designed to have a 24″ x 48″ cutting area, the machine dimensions are ~36″ x 60″, all the rails are designed to use black gas pipe and roller bearings, as in all things I work on, containing costs is one of the prime objectives.
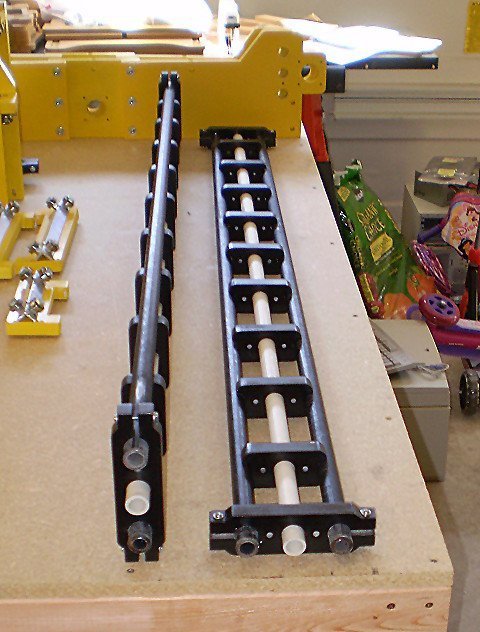
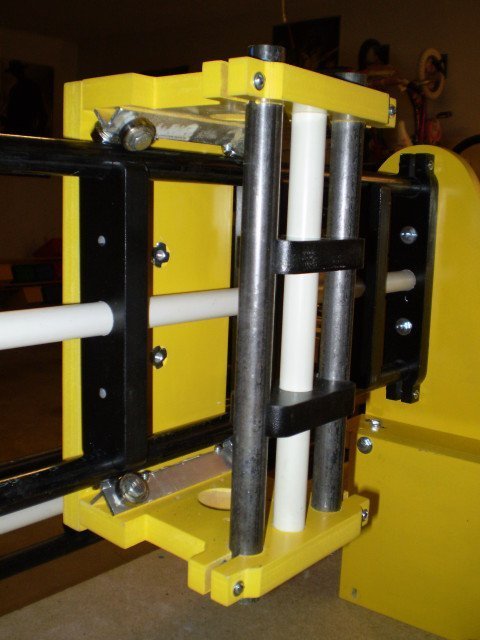
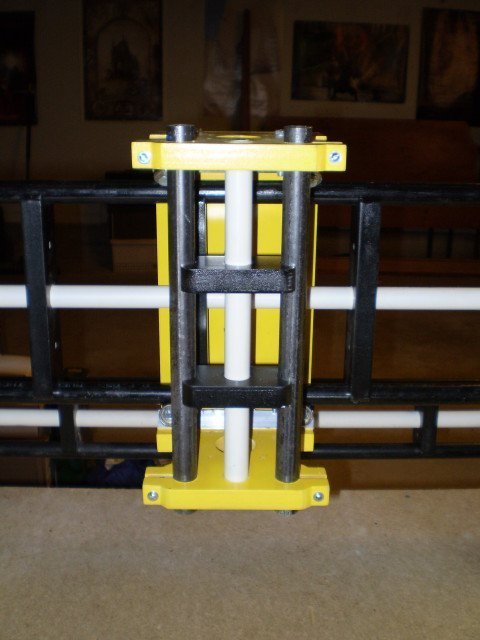
This is about where I stand at the moment, I just added the z rails right after this picture. I have a fair way left to go, the 1/2″ acme lead screws are here, the 4 270 oz motors are here, I am going to attempt to make my own lead nuts and couplings, so much work still lies ahead, I will do my best to post updates as the major pieces come together.
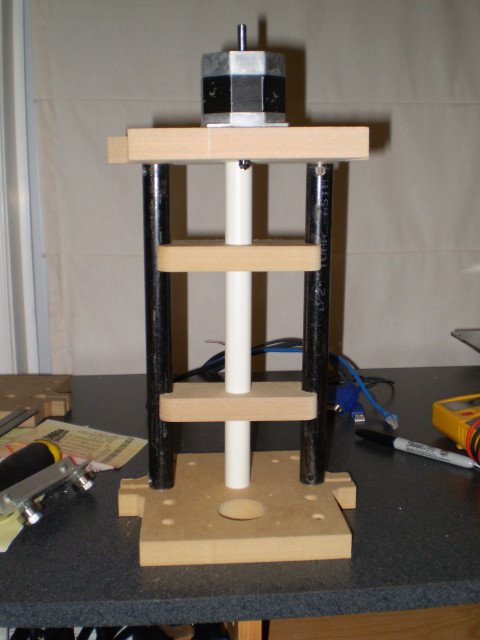
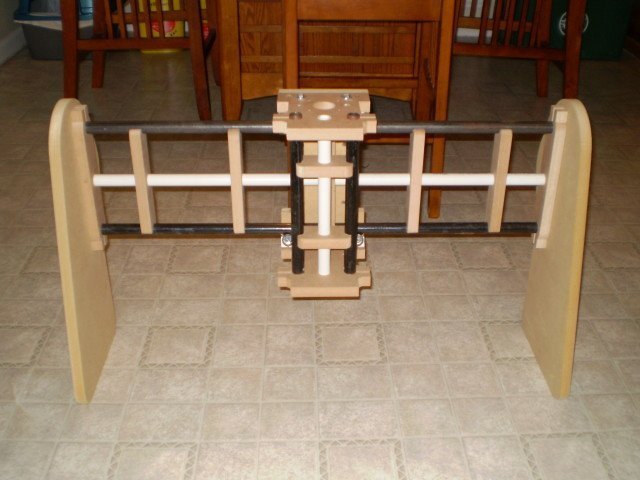
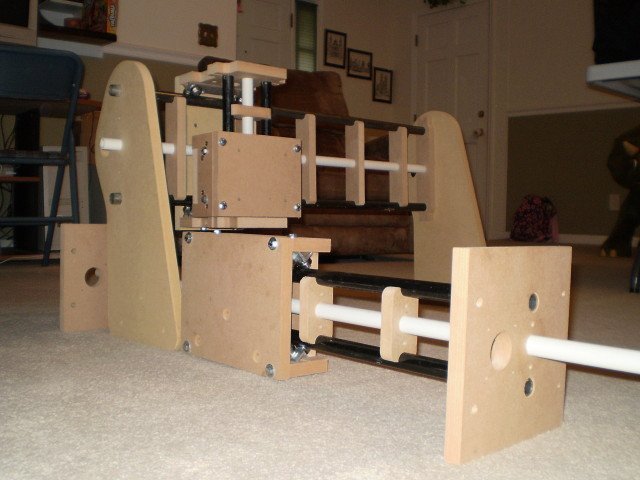
This was my initial proof of concept prototype, and it was solid enough, so I decided to continue cutting the parts of a prototype for each axis, there were a number of assembly points along the way.
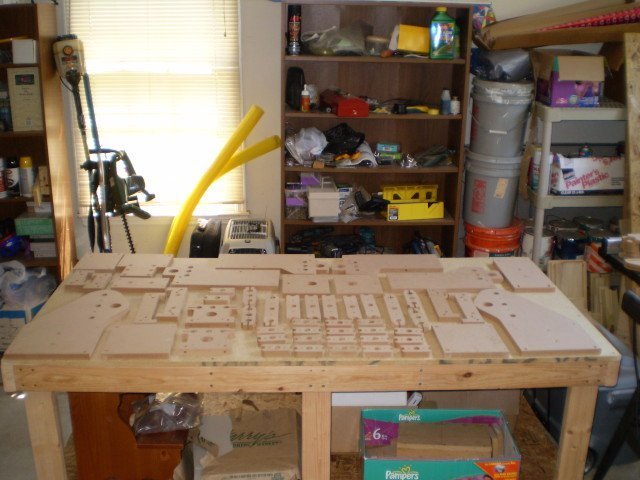
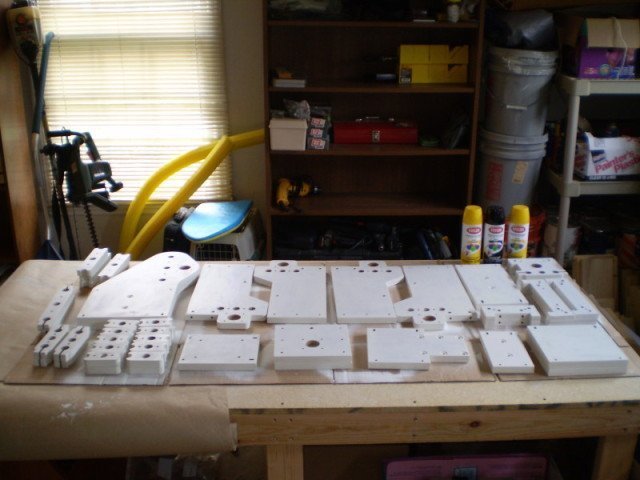
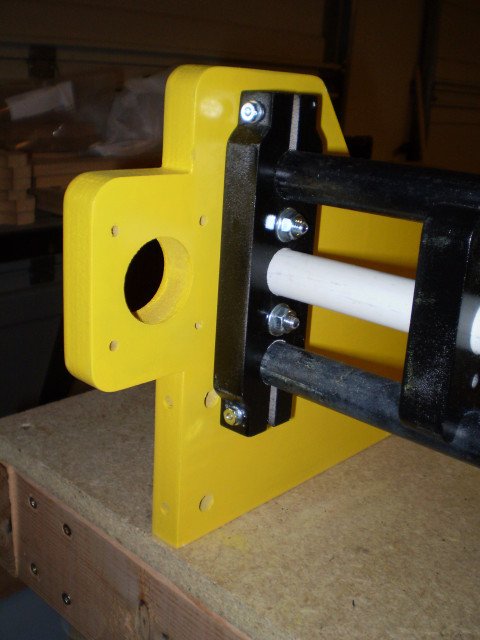
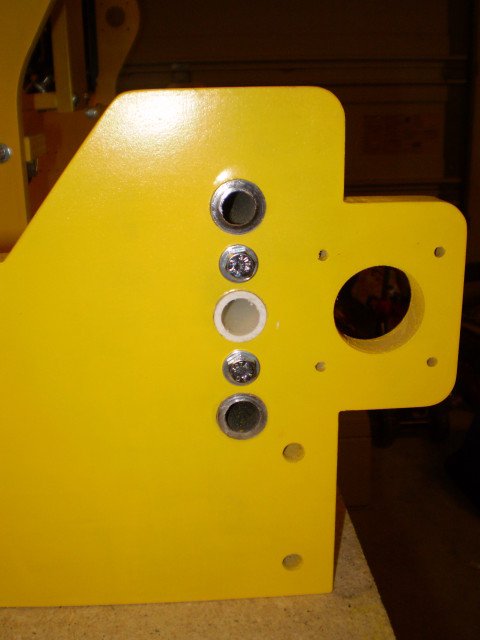
At this point it seemed like this might actually work, so I made some final adjustments to the design and proceeded to cut out all the parts need to build the monster. I then built the table you see them sitting on, and for some reason decided I should go ahead and prime and paint them… not my brightest idea, priming took forever, a lot of small pieces with way too many edges to seal. The yellow paint was a pain as well, 2 to 3 coats to cover, next time I am using dark blue 🙂
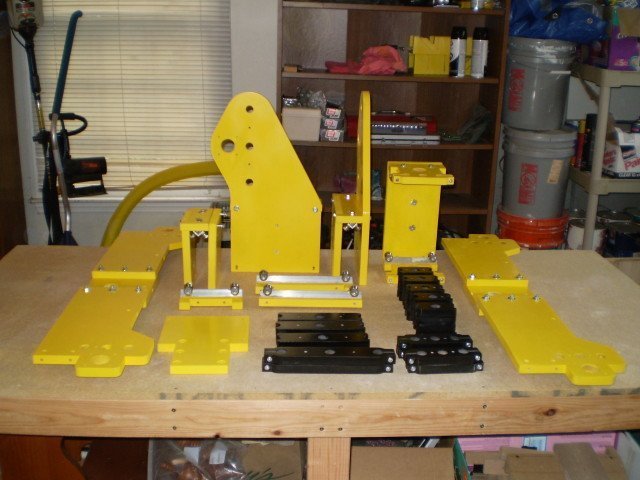
With painting finally finished, I assembled most of the major pieces fairly quickly…
I am VERY impressed!!! When you finish, will you be willing to publish your plans for others to build? I would really like to have a 2’x4′ CNC router table for building guitar bodies. Will you be putting together kits for sale? How much did you spend on parts and hardware?
Please let me know.
Thanx,
shotgunn
Thanks, assuming I am happy with the results, I plan on making the plans available (free for personal use, similar to Joe’s 2006), and possibly offering a kit if it can be done for a reasonable cost/minimal profit. You would have to have an existing machine to cut the parts out (max. part needs 24″ x 12″ cutting area), I could not imagine cutting all the small parts by hand. I am also planning on making another machine based on this one that should be not much more than a bag of parts, with the rest of the wood pieces being standard sized lumber purchased by the builder, but I have to finish this one 1st.
This is the current accounting (more or less) :
$40 – black pipe (30 ft)
$160 – Motors (4 – 270oz)
$30 – MDF (1 – 4′ x 8′ 3/4″ sheet)
~$15 – 32 bearings with 5/16 center hole (roller blade bearing)
$13 – 12 bearing with 1/2 center hole (similar to the roller blade bearings)
$6 – 4ft 3/4″ aluminum angle
$30 – Acme 1/2″-10 lead screws – 3 6ft pieces (from Enco w/ free shipping)
$20 – paint 6 cans (4 yellow, 2 black)
$10 – shellac based primer
$45 – 1/2-10 Acme Tap
$15 – 24″ x 1.5″ Acetal round bar stock
$25 – Misc nuts and bots, cross dowels, tee nuts, and pvc pipes
Sub-total: $409
Thing still to buy with estimated cost (may recycle some from 1st machine):
$22 – 24v 6.5a power supply ($22 – best deal on ebay at the moment)
~$80 – $150 – 4 Axis Stepper motor controller
~$15 – Motor wire
~$100 – Bosch Colt Router
Projected total: $626 – $696
Not too bad, like most things, it will probably run a bit over…. hopefully the wife won’t see this 🙂
Check back in a month or 2 and hopefully I will be done with the current build.
Thanks,
GrumpyGeek
Hello,
wonderful plan for a router. I would like to immediately get a copy of the files. I am helping my highschool
build a second smaller router. This one would be ideal.
I will sign a non-disclosure if you like.
We have vectric cut3d.
Thank you,
Roger
Pingback: grumpygeek.com » Blog Archive » DIY ACME Lead Nuts
I do not have the drawings in any sharable state yet, I need to merge a number a drawings together and filter out the revisions that have been made. As soon as I finish this, they will be made available. If this wasn’t the first time I am doing something with more than 3 pieces I might be better organized. This is a very part time thing, so I am not sure when it will be done, hopefully within the next month so so.
what made you decide to go with the bosch router?
Actually I am reconsidering the Bosch Colt router, I’ve read a number of posts lately that indicate the bearing mounts may melt with prolonged cutting. So Now I’m Considering the Rigid R2400, which is around the same price,and has gotten good reviews, with no indication of similar problems. I would consider using the DeWalt DW660 again, but I was hoping to get something that has a built-in speed control, so I would not have to use an external speed control again. The current DeWalt router gets a bit hot and takes a while to cool down, I figure something with a built-in speed control might dissipate heat better, of course I could be wrong.
Luckily I did not have a chance to purchase the router as of yet, since I ended up buying Rockcliff motor controller off of eBay last week. I have already wired up the motors and given it a test run in EMC2.
I got to work a little bit today on the final parts I needed, so all I have to do now is paint them. Unfortunately I have to work this weekend in the evenings to finish some work for work, since I am in training all next week and need to finish my current project. But hopefully next week in the evenings I will be able to get all the pieces painted and attached.
I think I read something on the Rockcliff site that you had completed your router, if so, where the pictures? 🙂
o the pictures are coming, i really want to make a video but my vid cam is not impressive 😛 so i’ll be gettin that straight when i can maby one day this week.
GrumpyGeek,
I’ve completed my Rockcliff machine & intend to use it what I built it for – to build a bigger machine =) If literally ANY DXF’s are ready for download, I’d be your first VERY happy “Customer” =)
-Pickuptrck
Chrisrob1469@yahoo.com
Pingback: grumpygeek.com » Blog Archive » The build goes on…
HI,
Your yellow machine is so simple it inspired me to build one. May I get your permission to base my design on yours?
My questions: Is there a noticeable sag in your X rail? Its only support are on both ends.
Is the frame really strong considering its only supported, again on both ends?
Thanks in advance.
Jordan
I have no issues if you base your machine on mine, I am hoping to sell a kit version of it (and/or something smaller) in the near future, but the plan has always been to release the plans for personal use. I am in the process of sorting thru the cad files and assembling the parts that became the final version, I have a few corrections/modifications to make, but then I will post dxf files. I have not notice any appreciable sagging of the rails yet, and the frame seems sturdy to me, I am almost done with the table, which will also help to tie it all together. There are also provisions for 2 rails (1″x4″x60″) that run length of the machine (notice the cross dowel holes in the table legs). However I found these are too close to the gantry legs, so I need to move them out about .75 inch (which is one of the things I need to correct in the plans). I will be cutting some spacers and attaching them before I am done with the machine, which should also firm things up some more.
I will also be moving the table down a bit, as my clearance of the table is less than 3 inches, this is due to my being wishy washy on whether to have a table on the legs, or just using the table the machine sits on as the cutting area.
I have another design that I started prototyping for a “Bag of Parts” kit that might also eliminate you sag concerns, I plan on finishing it right after this one 🙂 I’ll make a quick blog entry in the next day or so you can took alook and see if it is something you want to pursue.
Anyways, good luck and let me know if I can to anything to help.
Thanks,
GrumpyGeek
A dust collector alone is rarely sufficient protection against the dangers of dust. In reality, even the best dust collector can leave clouds of minute airborne dust particles floating through the air. To adequately control both huge volumes of large particle debris and the considerable amount of fine dust particles that woodworking machinery produces, it is almost always necessary to supplement your dust collector with an air filtration system.
I just got involved with a lathe project that uses 1/2″ Acme rod, purchased the rod, regular ACME nuts, pillow blocks… but I had not figured out how to transfer the motion until I saw your article. I will be using a hand crank so your issues with speed are not an issue.
When I looked for sources of ACME flange nuts/assemblies, the price for 1 is more than I spent on the whole project until now. Would you be willing to sell one of your nylon blocks (the wood and two threaded spacers) or at least two taped spacers or have you found another way to transfer the motion?
Is there a reason I can’t just capture the hex nut in a piece of wood and then attach the wood block to the carriage I want to move?
I think the hex nut will work, the main reason people look into using the plastic type of nuts is back lash and friction/wear. You can also find reasonably priced 1/2″ Acme flange nuts on ebay: http://shop.ebay.com/?_from=R40&_trksid=m570&_nkw=1/2-10+Acme+Flange+Nut+CNC+Router+Mill+Lathe+Leadscrew.
That being said, I will gladly make you one of the lead nut carriers I am using, do you had any specific needs (like mounting into the side of a board instead of in the middle using tee-nuts like I have done)? It will take a few days though, my shop area is a wreck right now, been stalled on the new machine build for a few months, so the work area has accumulated all kinds of junk.
Let me know,
GrumpyGeek
I like your design very much and I want to build one. Any plans for a kit yet? I have been looking at build your cnc dot com site and was leaning towards the bluechick and then I was reading their forum and looking at dust collection which led me to youtube and one of your videos which led me here.
Have you looked at the stepper motor controllers listed on Ebay from China? What size motor are you using? NEMA23’s? Why the PVC pipe on the sides?
Thanks, I just finished assembling this one about 3 weeks ago, I am in the process cutting a new machine to test a number of changes I made to address a few things I didn’t like or had trouble with, once I have that up and running I plan on cutting a few kits for sale and to see if it is something I think I want to pursue. It there a particular size you are looking for? The bluechick looks like a nice machine and with the belt drive should be pretty fast. I am still working with 10 tpi single start lead screws, but I think I will need to look into 5 start lead screws if I decide to make kits long term… hopefully I can sell a few kits to finance them.
I am using 269oz Xylotex motors (Nema 23) and a Rockcliff 4 Axis stepper motor board, I have seen the boards from China on Ebay. I am a bit weary, but I may pick up one of the A3977 based boards in the future just to see how well they work.
The PVC in the pipe assemblies is more about lining things up during assembly than anything else, but I was also planning on running the wires for the limit switch thru it as well.
So do you have any idea of the cost for the wood parts? Have you looked at MDO? Home Depot is 44.97 for a full sheet, it costs more than MDF but may look nicer and hold up better that MDF. I wish they made a version of MDF with a waterproof glue.
I was thinking of getting the motors domestically and the electronics from China. The Chinese motors cost about the same after shipping and if I had a problem it would be easier to deal with.
As for motors it seems like the Z axis could get away with a lighter rating because all it does and raise and lower the Router. It does not affect the XY travel speed.
I am fairly certain the parts can be cut from about a 4’x4′ sheet of material, plus a little bit of Trex decking or HDPE. I would really like to try the MDO but I can’t find a local supplier that sells to the public, the Home Depot and Lowes near me do not stock it. I am going to ask around of few of the wood working forums and see if anyone can hook me up. I am going to keep the cost as low as I can while making it worth while for me, I should have a better idea soon. Another thing that may drive the cost up is that there are about 100 cross dowels in use in the latest design and that is a lot of holes to drill even with a good set of jigs.
The only thing I would say about buying the electronics is that while I have not personally blown any chips, I have read about people who have. I know both Rockcliff and Probotix charge a modest fee for repairs, not sure how that would work with the imports. (If they are cheap enough, I guess you could just buy a backup.)
The speed of the Z-axis can be important if you are planning on doing 3d carving… have not done any myself but a guy at work has and apparently slow Z made the process take a lot longer (and slows his X/Y movement).
Pingback: grumpygeek.com » Blog Archive » First Cuts of the Black and Yellow Beast
Pingback: A work in progress | BootstrapCNC
ARE THERE ANY PLANS AVAILABLE? I’VE ONLY RECENTLY STARTED WITH CNC AND I LIKE YOUR DESIGN.THIS WOULD ALSO FIT MY BUDGET.
I have plans in a almost ready state, but unless you are building a small machine (1×2 or so), I would recommend other plans. The RockCliff model ‘D’ is a easy build, you might check those out. I have a new machine I am working on, it should be fairly cheap to build with fewer issues, but I am not done with the fist build yet so I don’t have plans ready for it yet either.
I am writing to see if there are any plans or kits available yet?
Never relesed plan for this machine, but I have plans available for another one here: http://bootstrapcnc.com/