So this has been a long time coming, but I finally made myself spend a few days cleaning up the plans I had been working on to get them into a state that I thought it was ‘good enough’ to post. You can now find plans for the ‘BootstrapCNC Router 2015’ here:
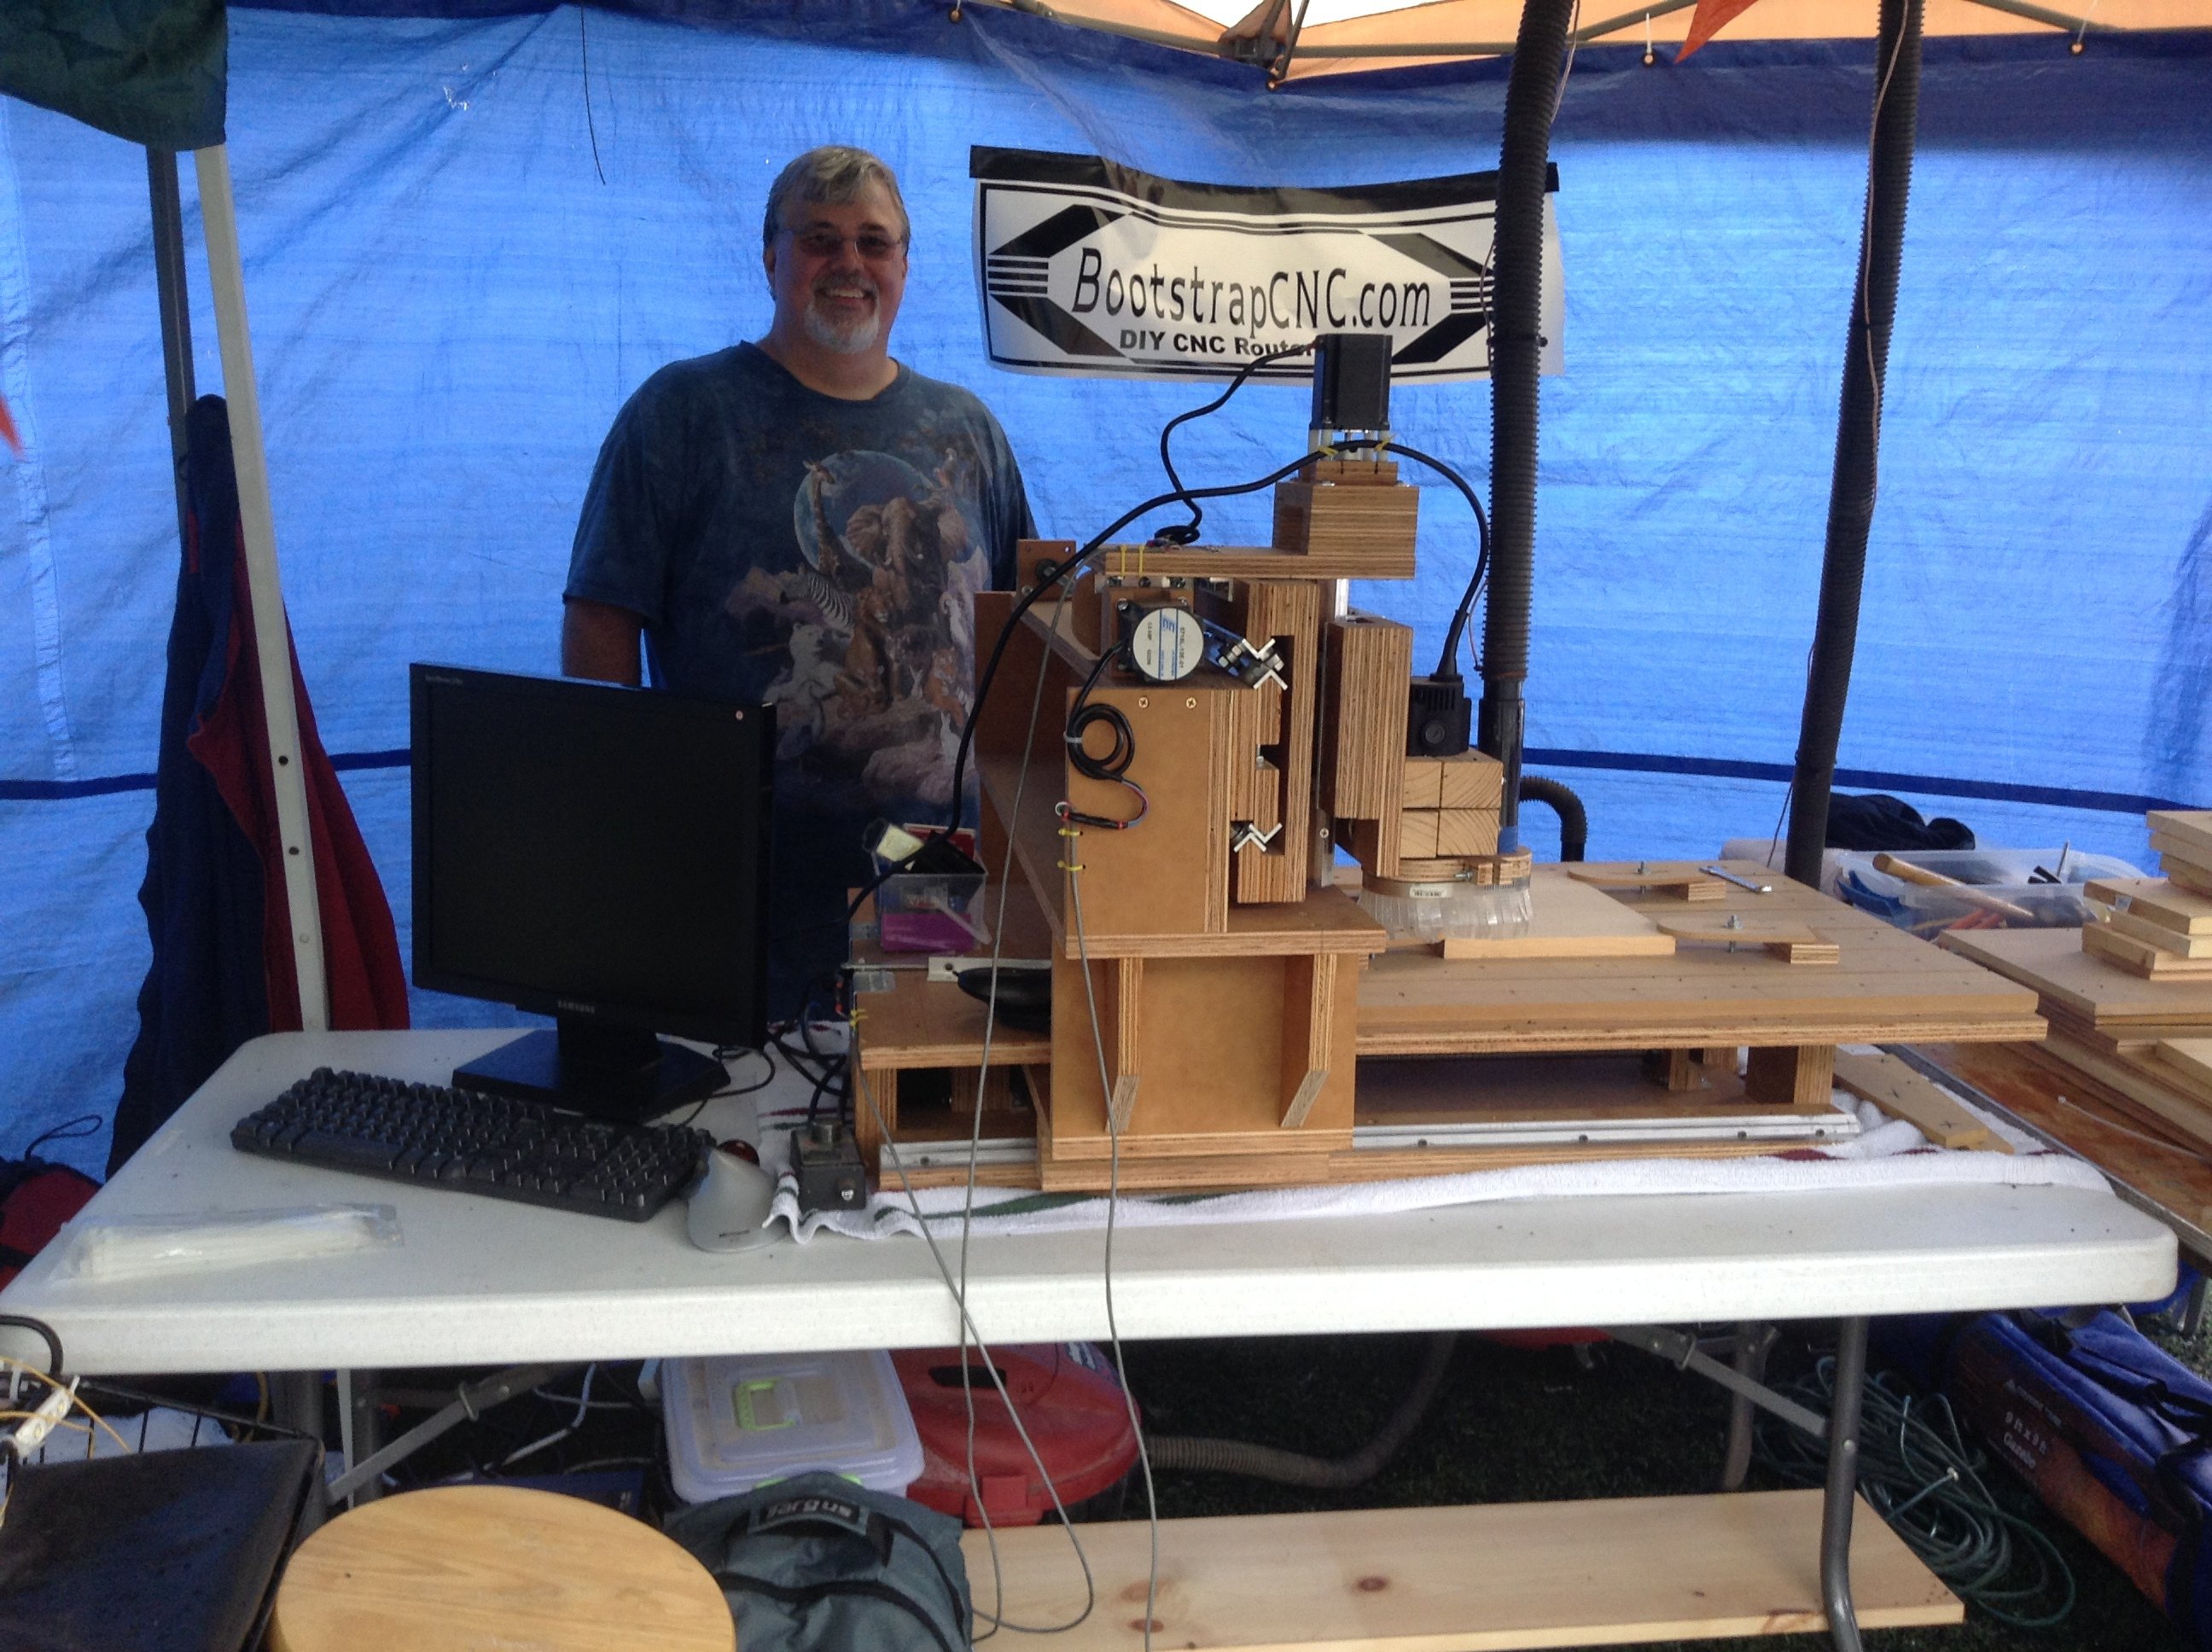
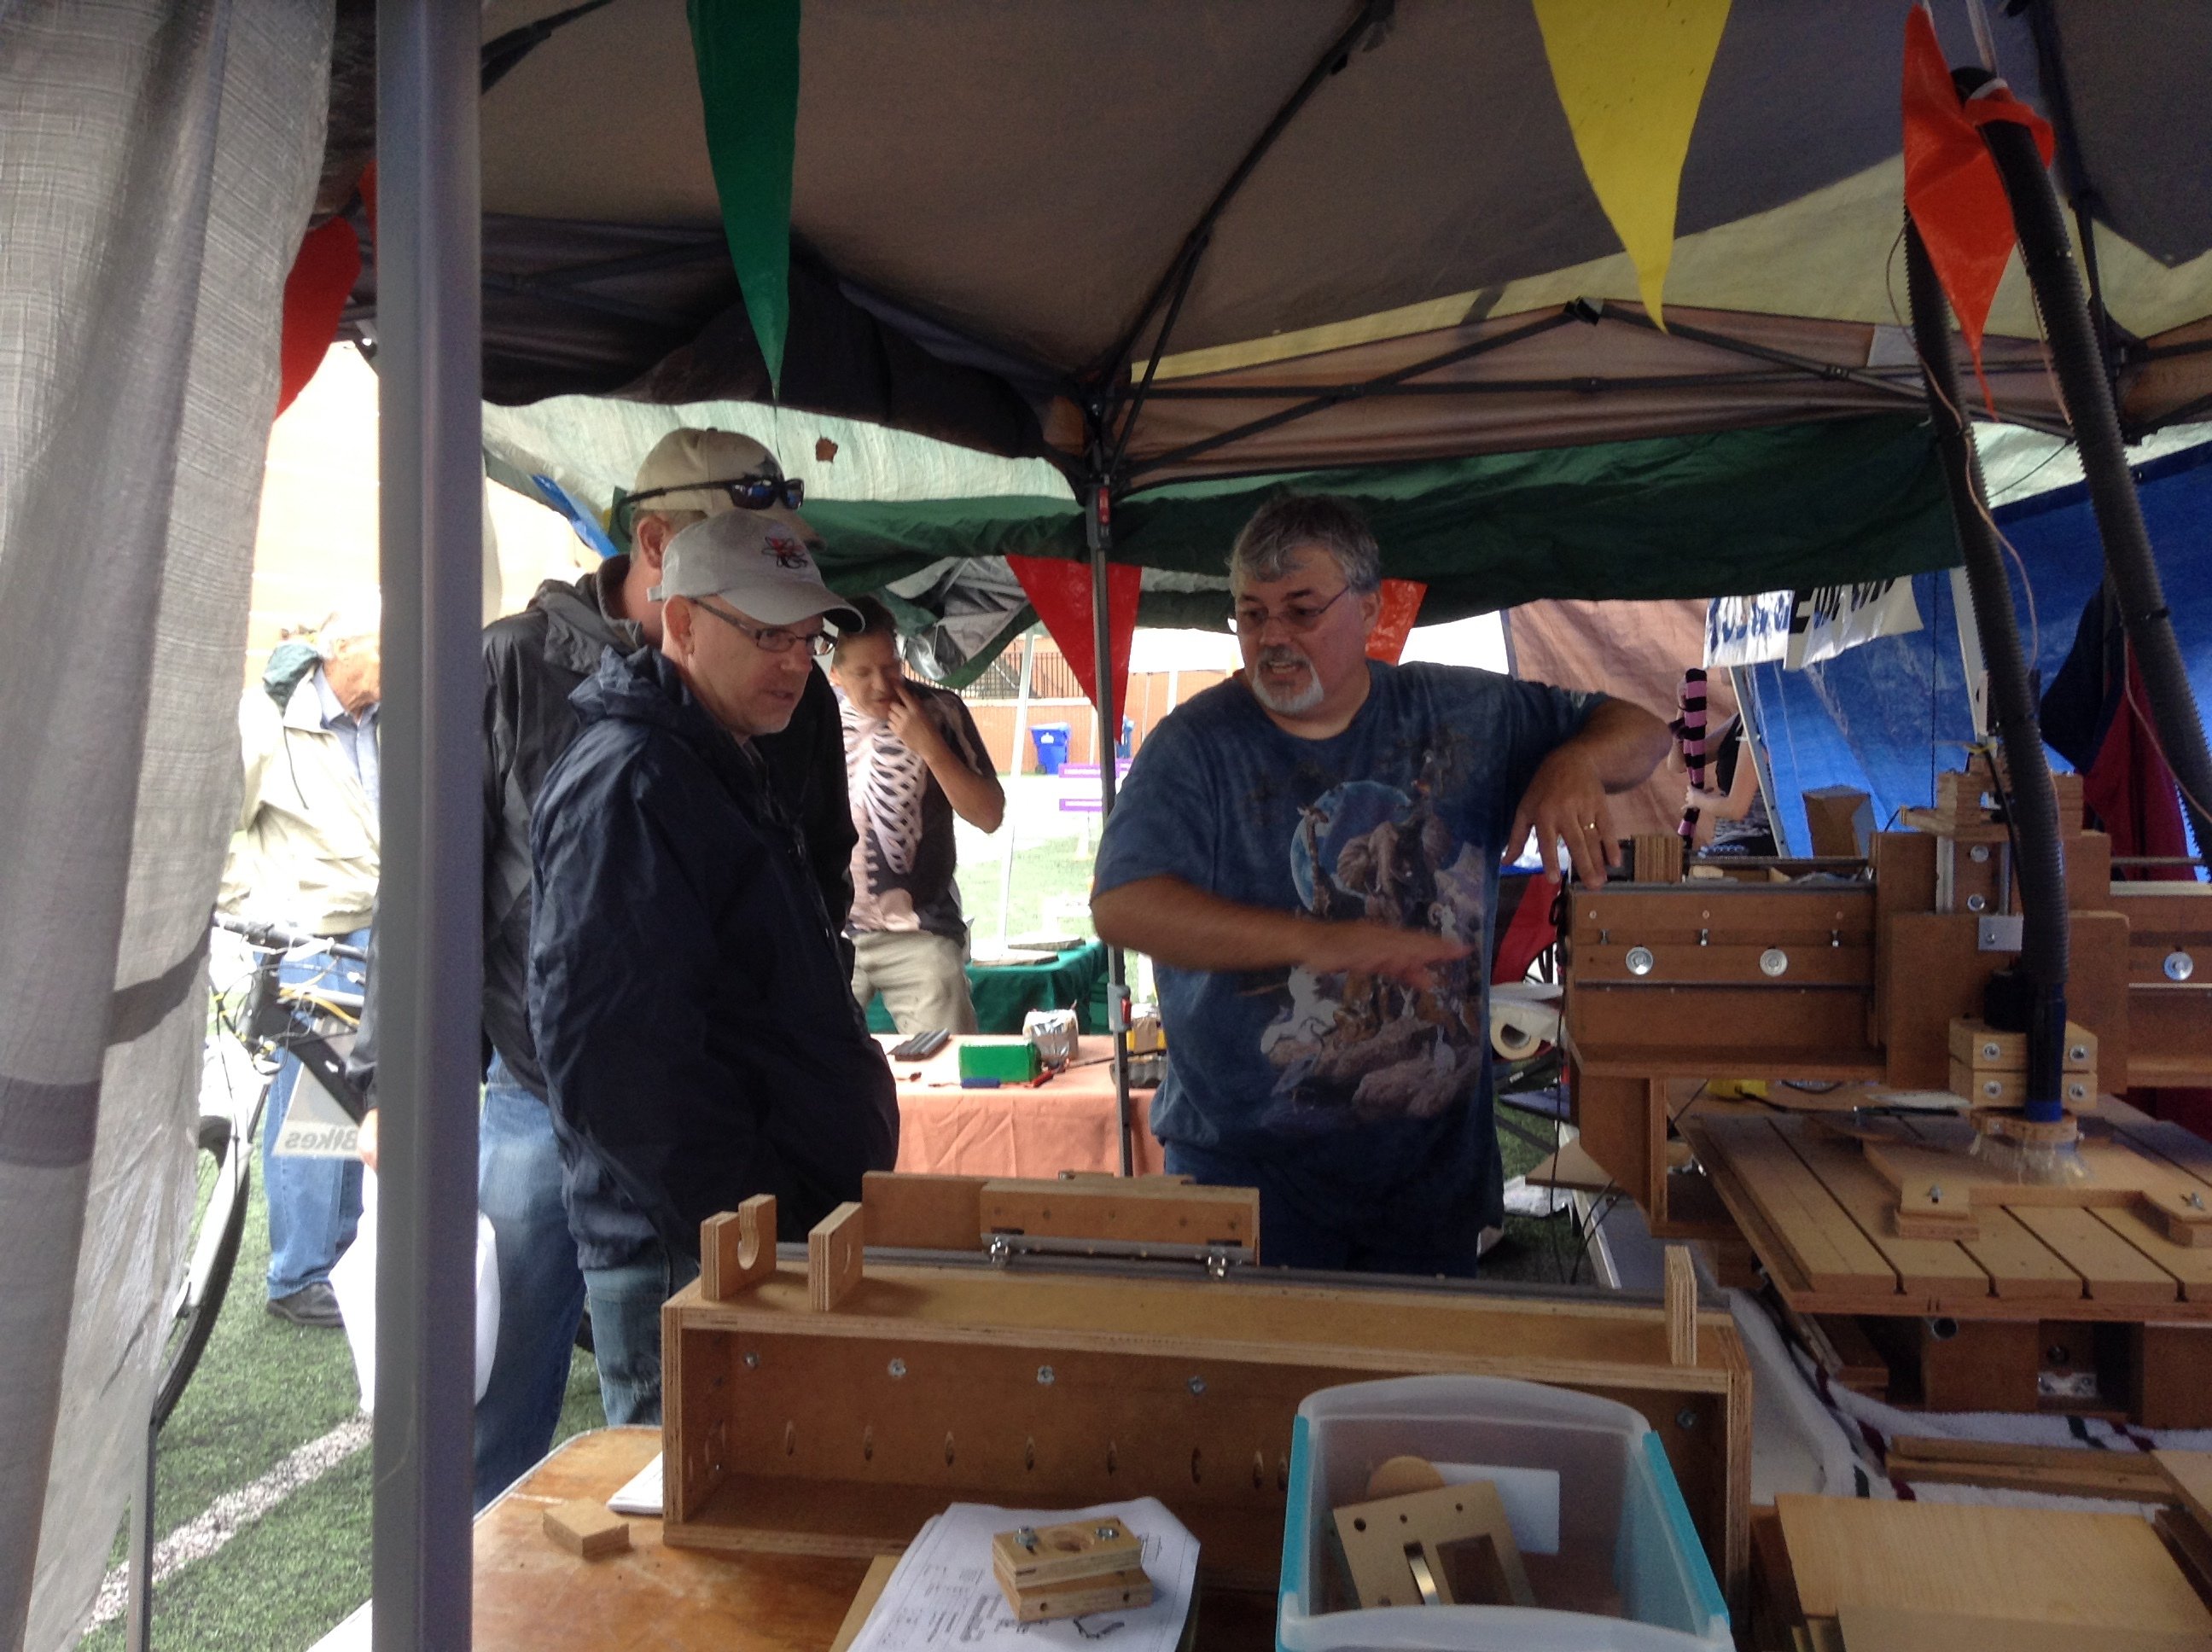
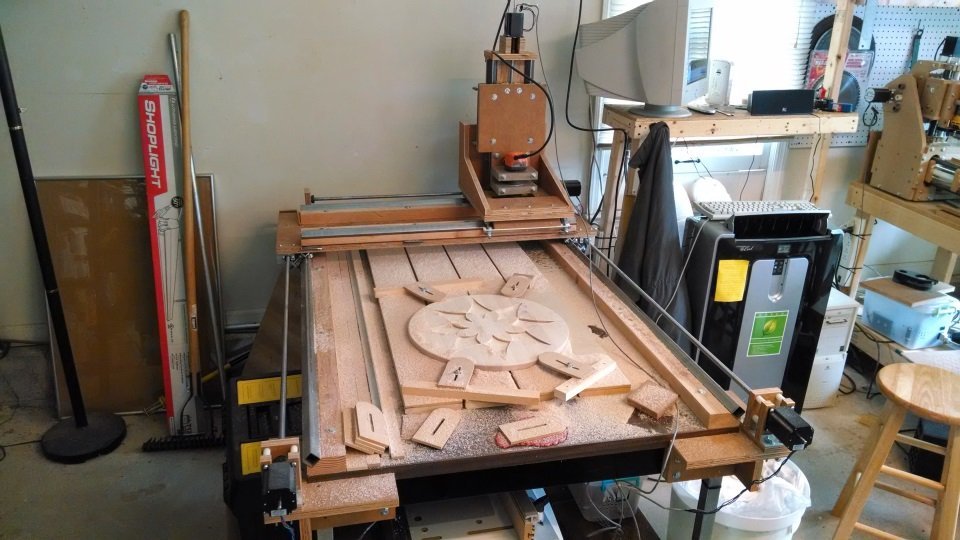
Since the last post I have completed the moving table prototype, it was not in time for the Maker Faire Atlanta. But I took the gantry part of what I had completed and the Flying Gantry prototype and displayed it in the Roswell/East Cobb Makers booth and had a lot of interest. I said I was going to be done the plans in a few weeks… well I wanted too… better late then never?
GrumpyGeek at the faireLots of talking…
I was so busy talking to people in the booth that I never got a chance to go look around. Due to weather we had to pack everything up and we were too exhausted to set up the next day, but I did get to go back with my kids and had a great day.
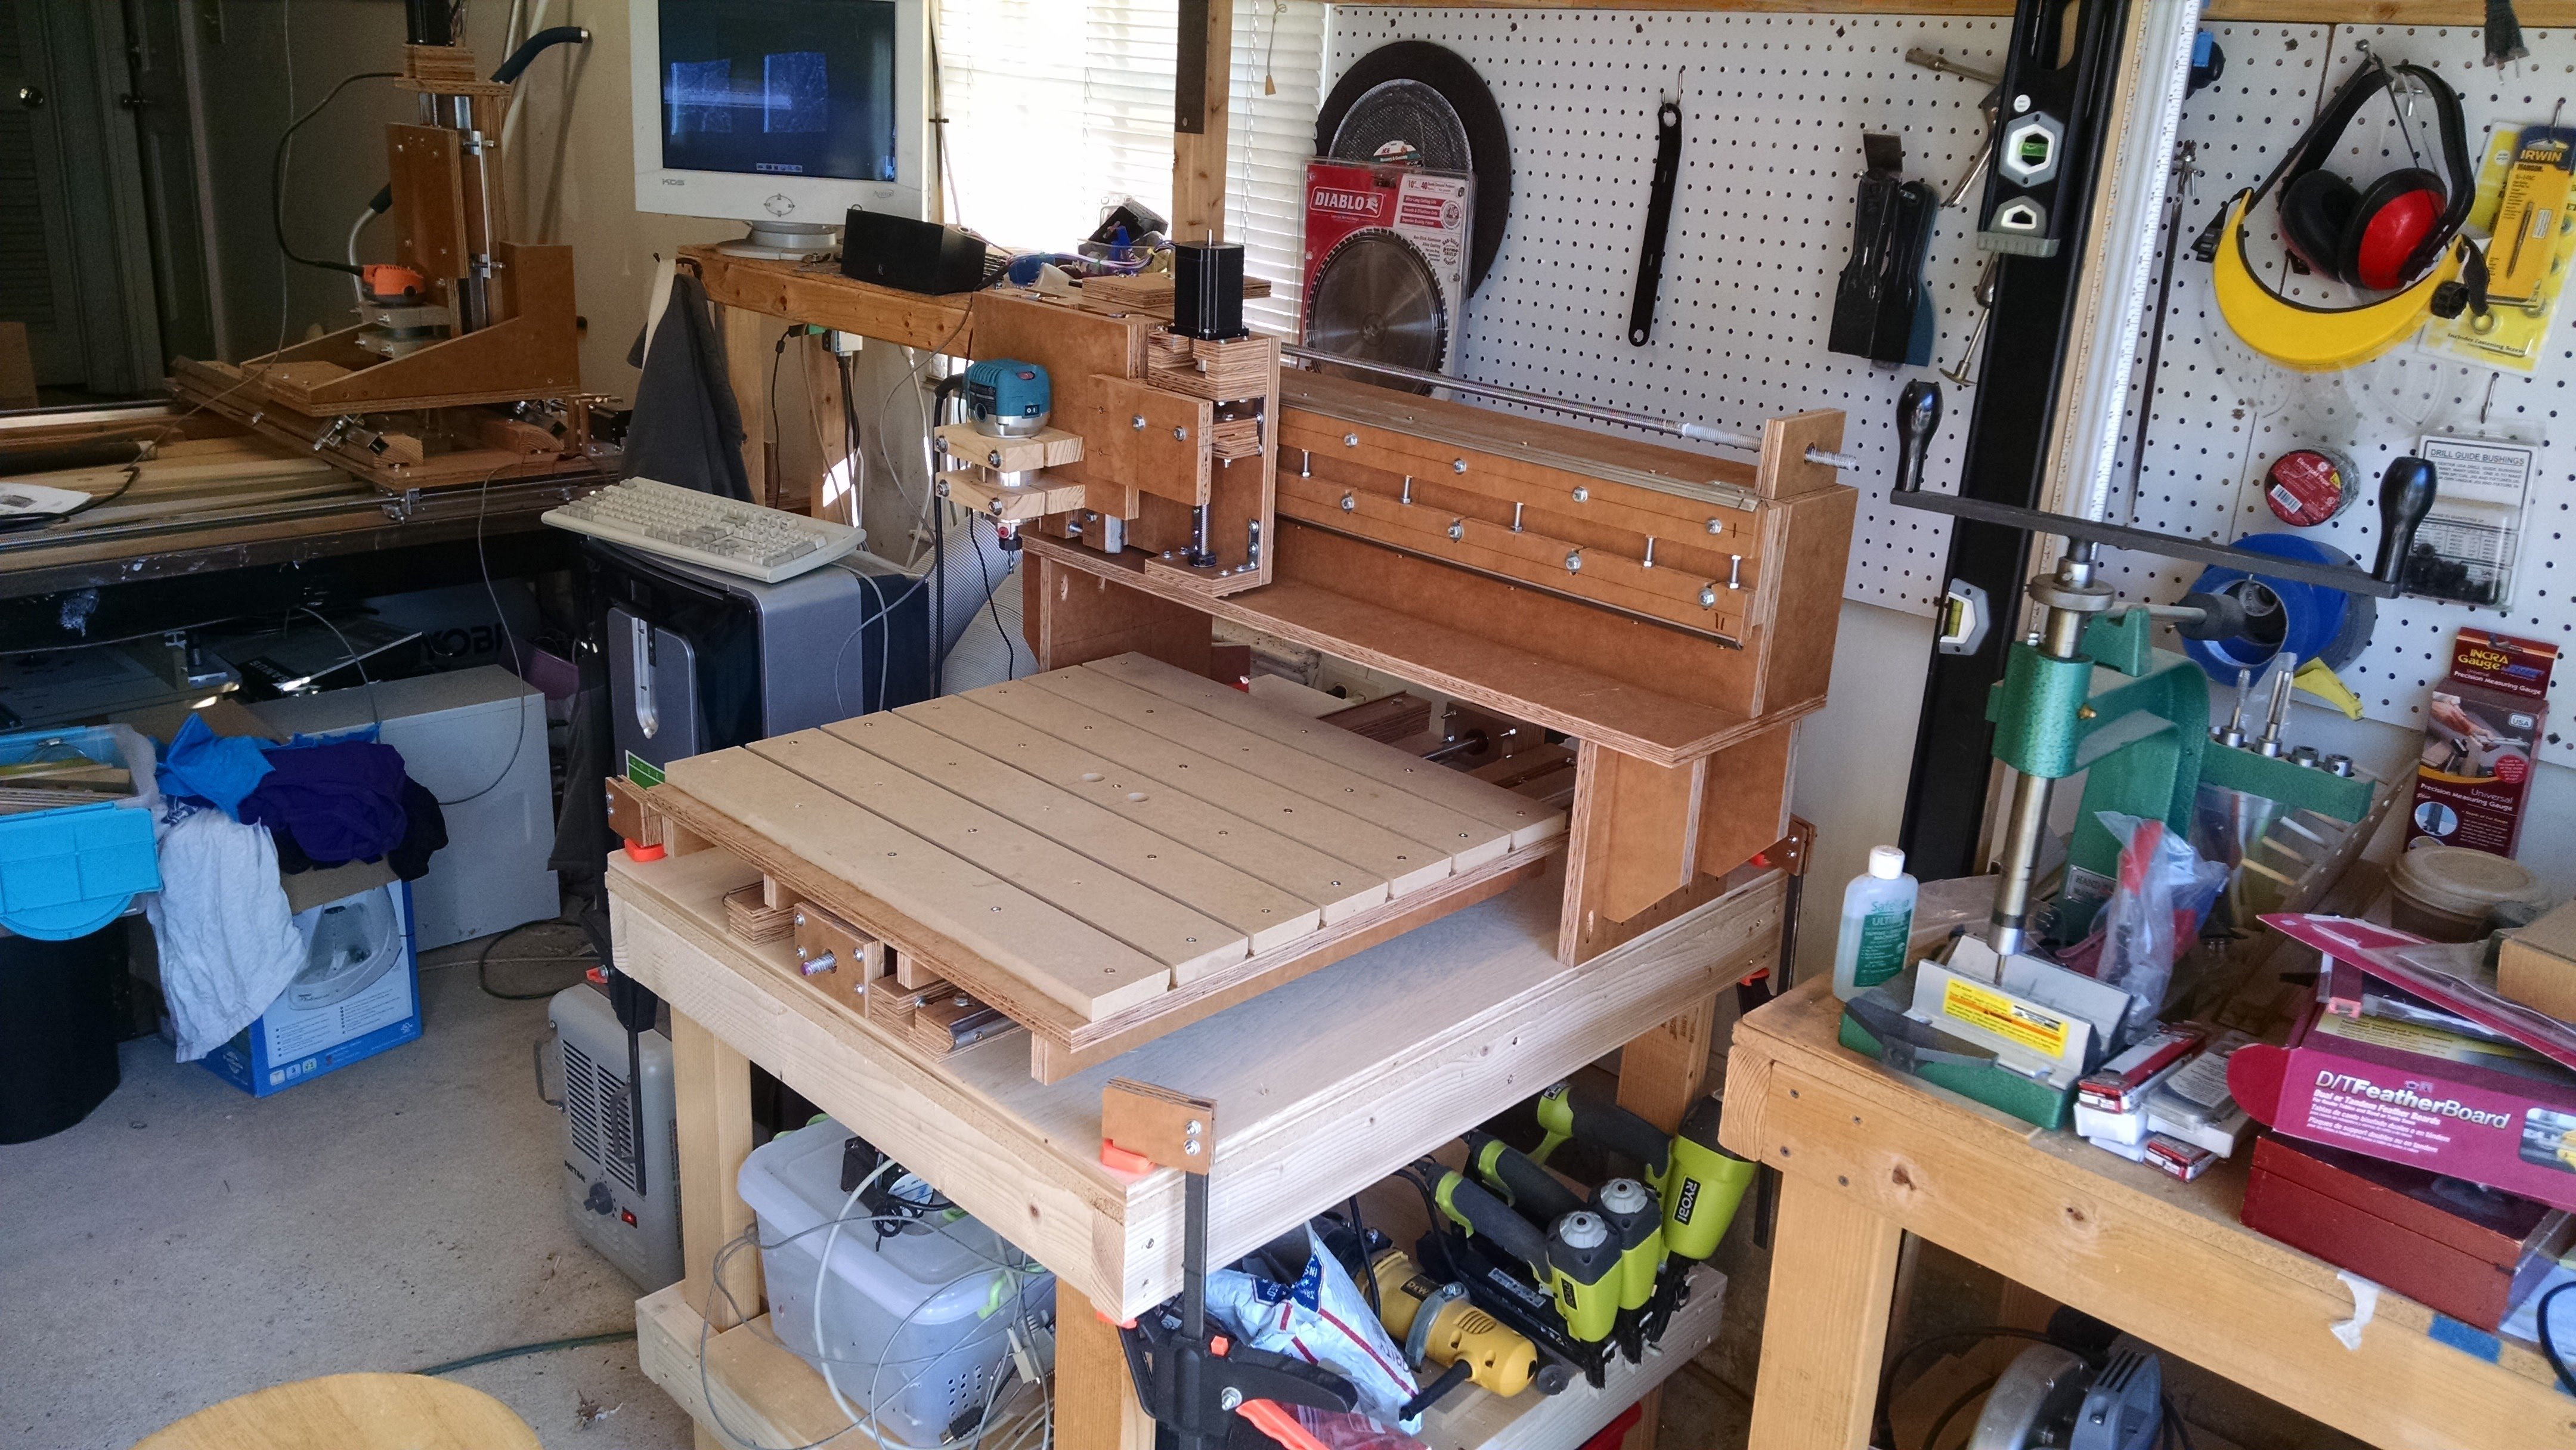
After the Maker Faire, I was sort of cooked from all work that went into trying to get things done and lost the momentum I had leading into the Maker Faire. I had sometime off in December and on the days that it was warm enough I got back into the garage to finish the moving table machine, and then it was time to update the plans.
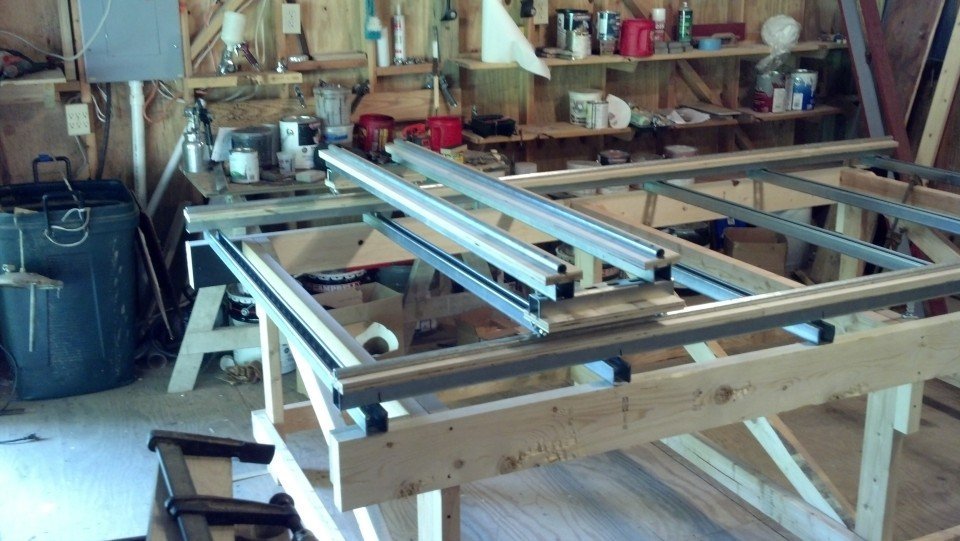
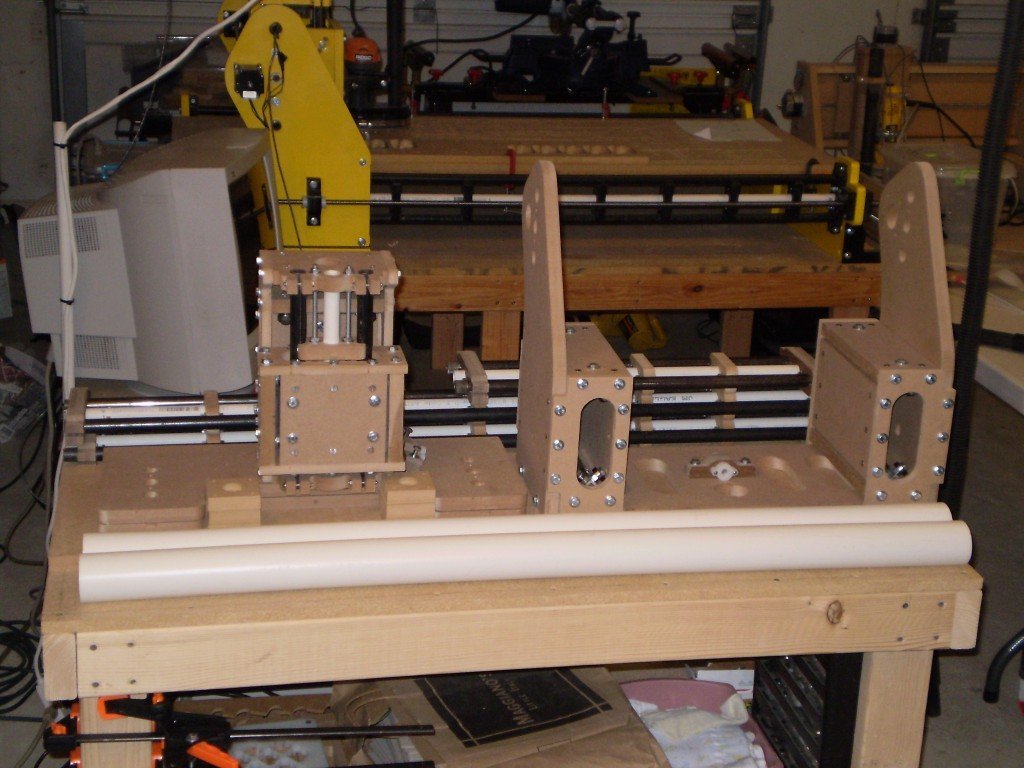
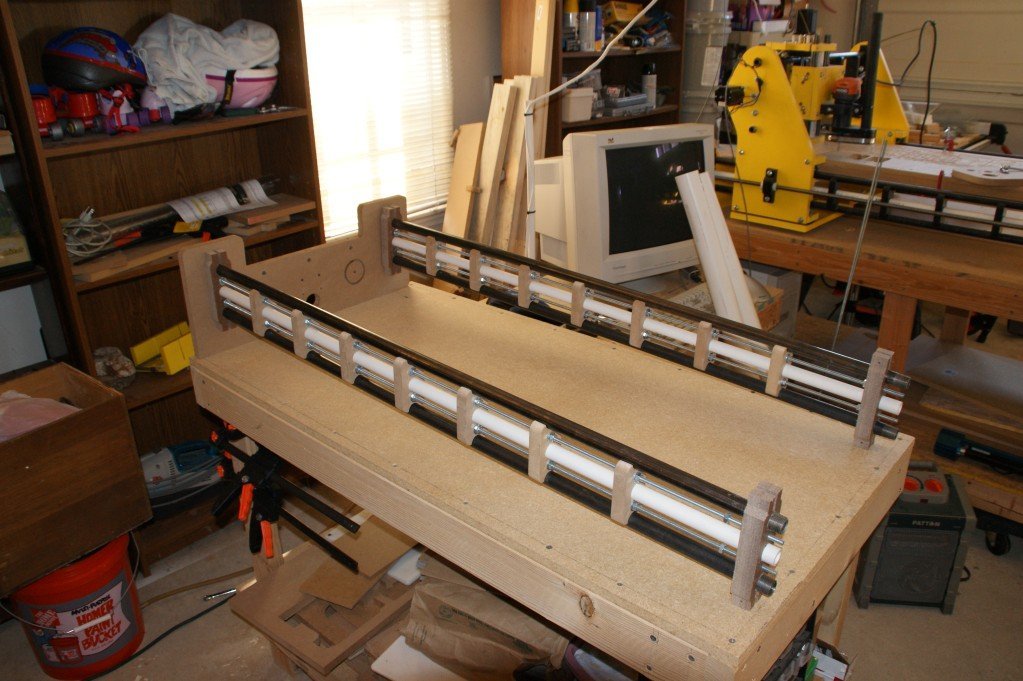
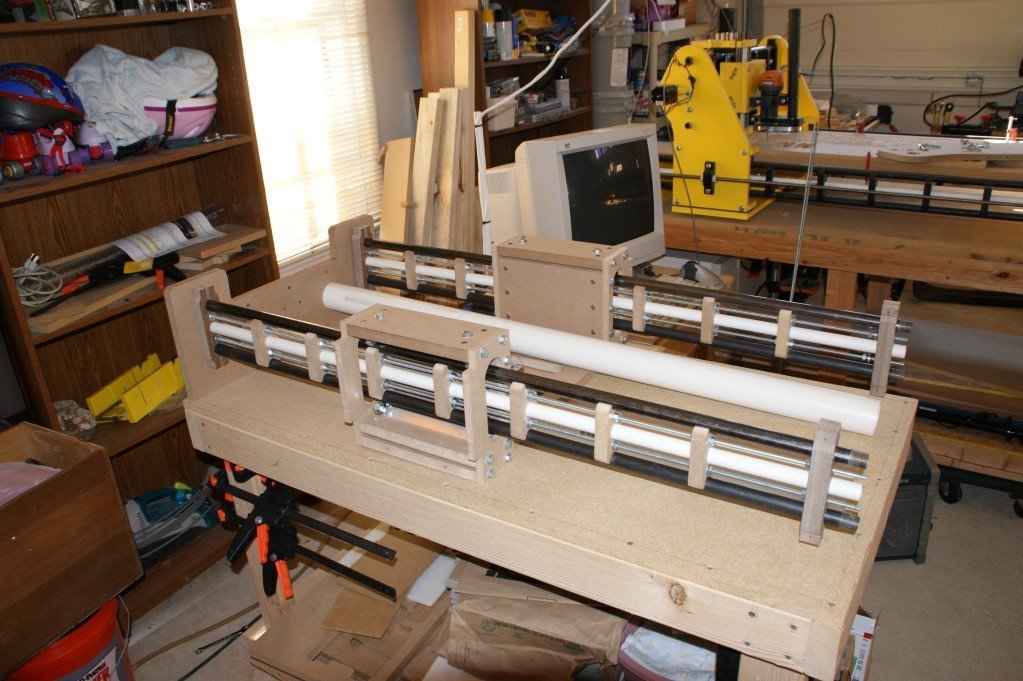
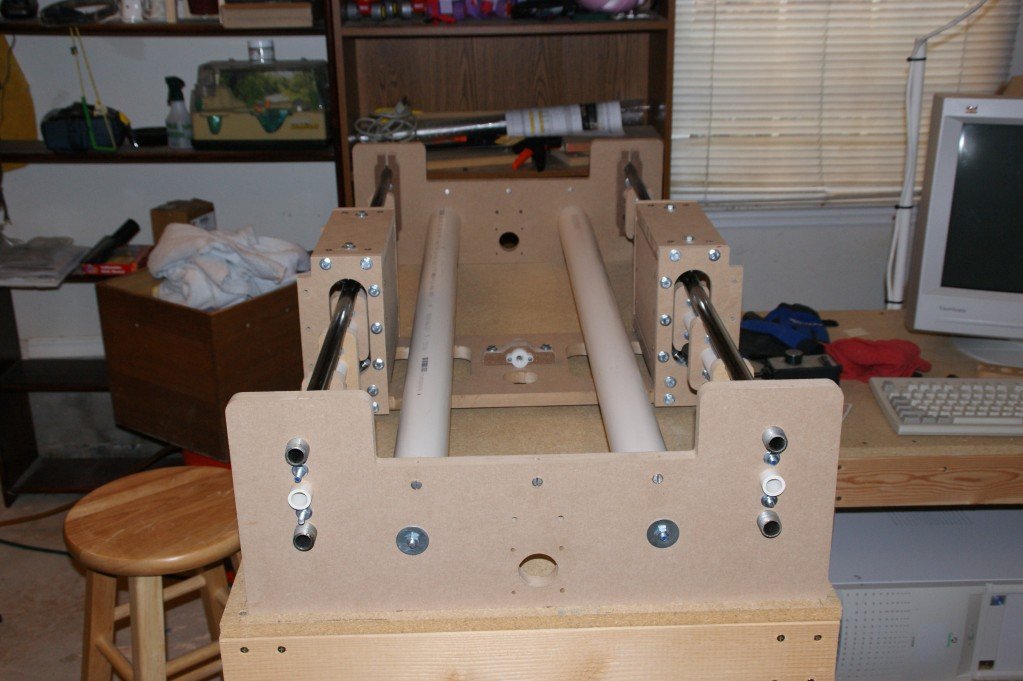
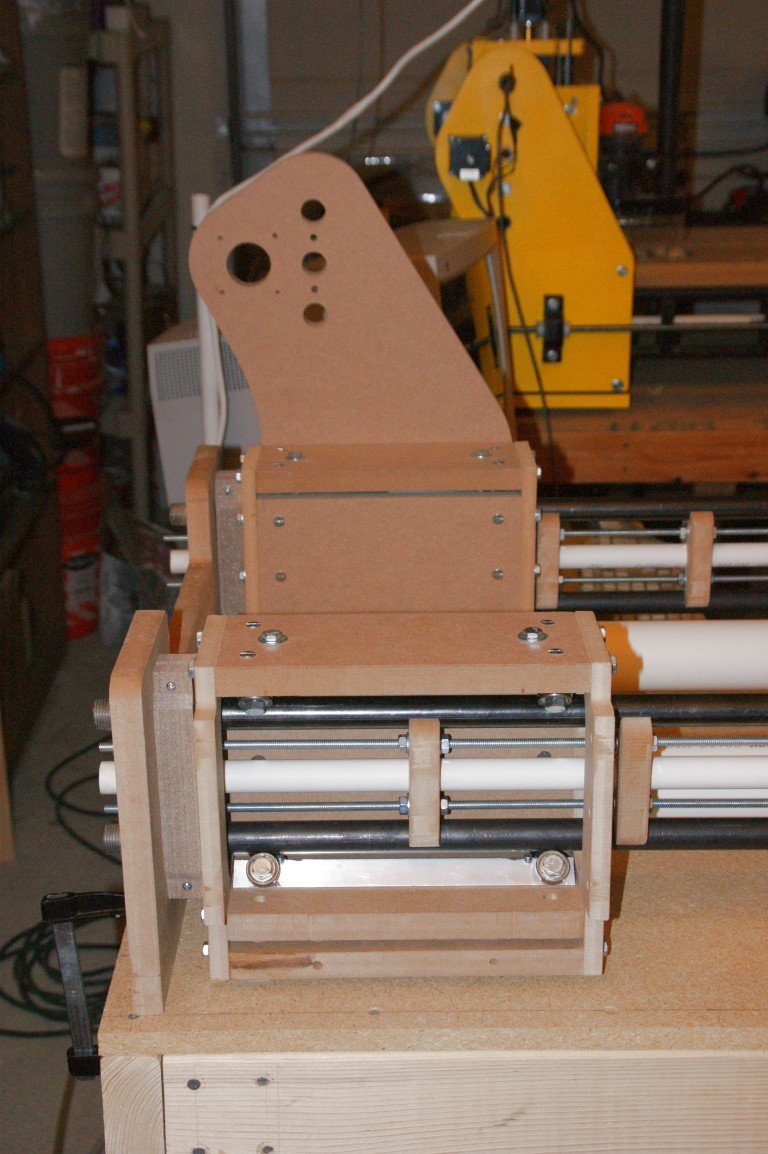
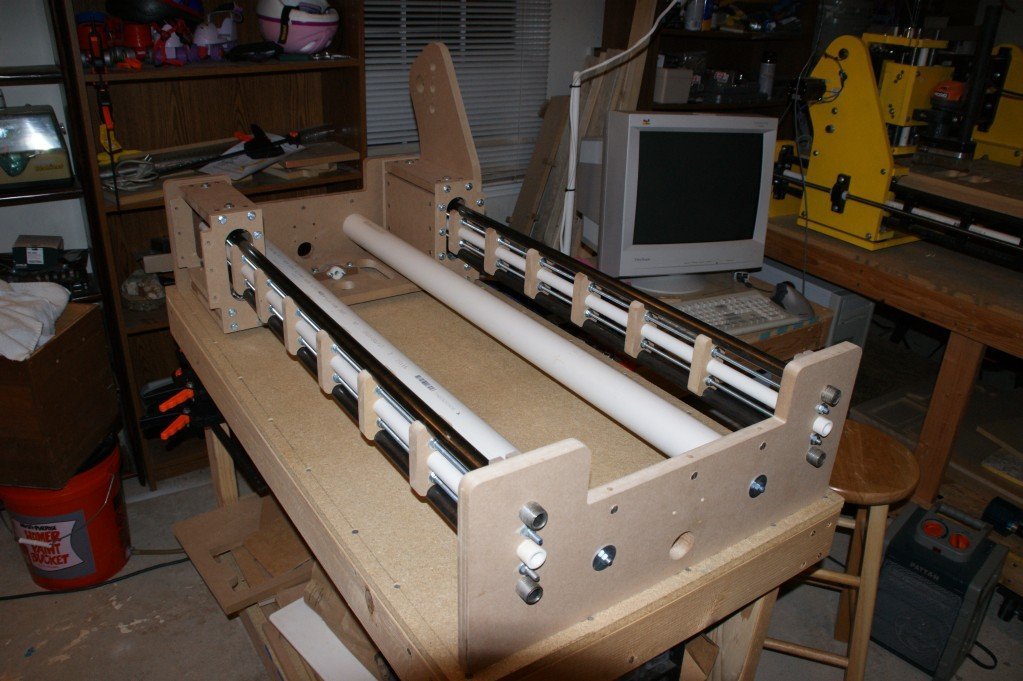
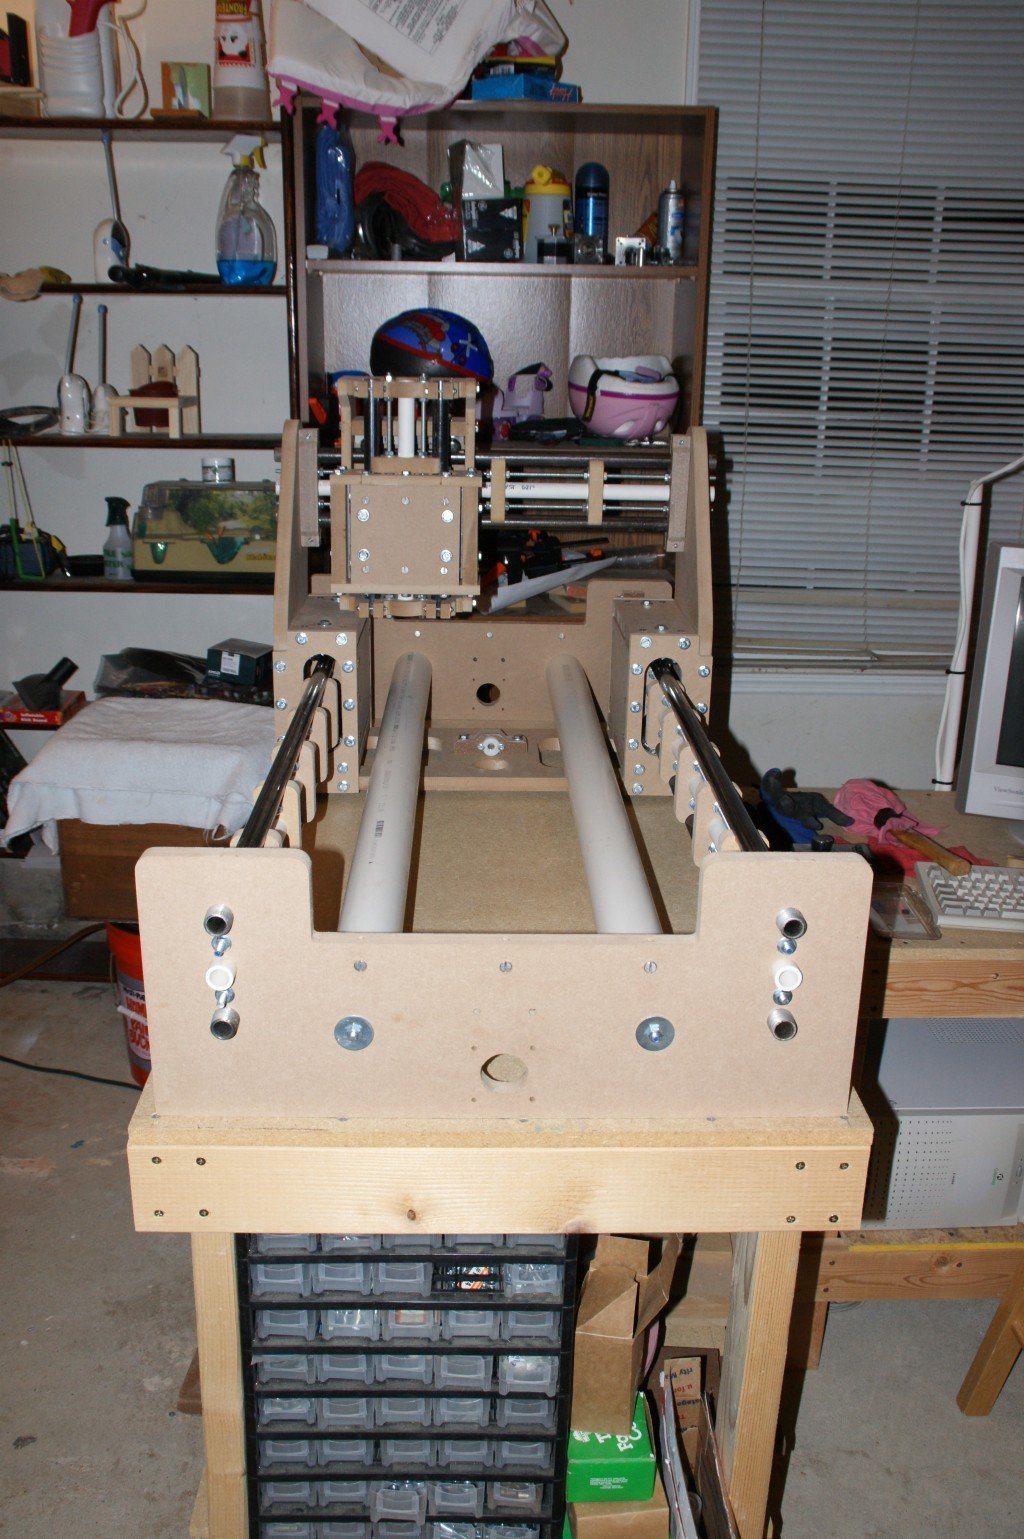
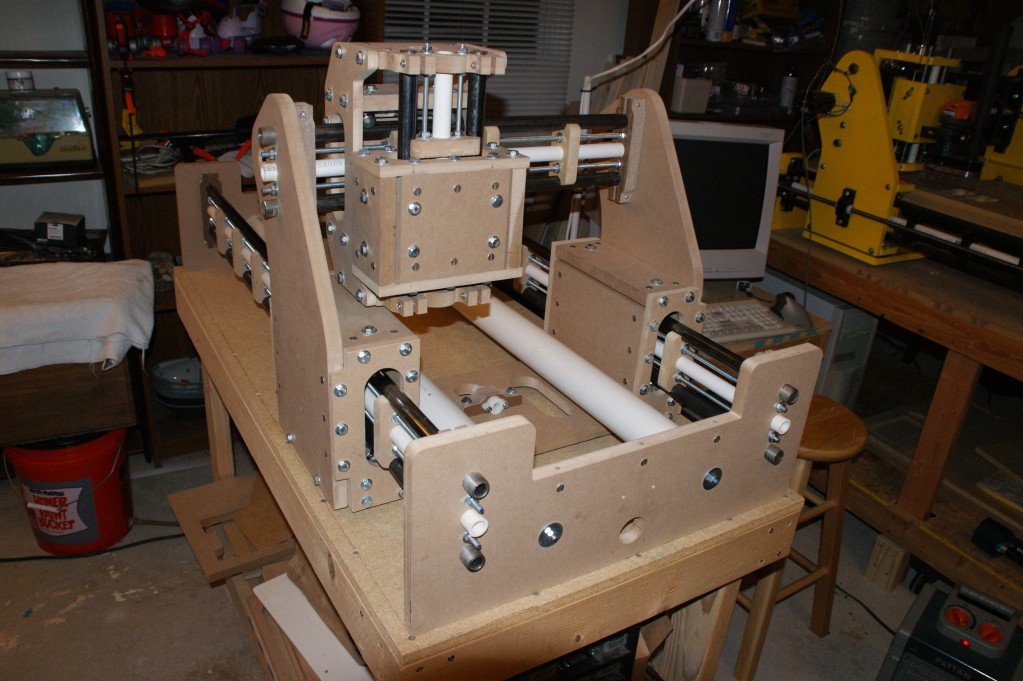
Moving Table Prototype
Doing documentation is not something I have ever enjoyed and generating plans from a cad file can be particularly difficult when you don’t really know what your doing 🙂 I muddled thru it and the results are what I posted today. Please let me know what you think, any suggestion for improvement are welcome, and if you actually use them I would love to see the results.
I have been building CNC routers for almost 6 years now, I have built 5 machines for myself, and helped a couple of people finish theirs. The results have been mixed, the Rockcliff machine was a good machine given my skill and budget at the time. The Black and Yellow Beast was interesting and worked fairly well, and the Son of the Beast 1×3 machine came out very well. The larger 2×4 Son of the Beast was OK, but the expected improvement over the Black and Yellow Beast was not as great as I had hoped and it was overly complicated. I started a large (4×8) Unistrut based machine that died before completion. The next machine (unnamed) was an effort to simplify and resulted in a sturdy machine that is limited in cutting height and dust collection. I have had fun (mostly) building these various machines and have spent enough to have built a really nice machine, so you would think I would give up and just buy something by now.
Well apparently I still haven’t learned my lesson. The whole reason I started my own design was to build the kit I would have like to have had, and even though we now have new shiny things to play with (3d Printers and CNC Frickin Lasers), I am still plunking away at building an easy to build, cheap cnc router.
“I have not failed. I’ve just found 10,000 ways that won’t work.”
“Many of life’s failures are people who did not realize how close they were to success when they gave up.”
… So this post has been sitting as a draft for almost a year, in that year I have built a prototype of the Flying Gantry Design 1 and drawn up a combined set of plans for the Moving Table Design 1 and Flying Gantry Design 1 that I am going to try to release very soon. I did post sporadically to my Google+ Page, so if you are interested in a few build pictures you can find some there.
Flying Gantry Prototype
My short term goals are to post the plans, post a more detail build entry with more pictures and a cutting video, build the moving table version and document the process, and finally present the plans and the 2 machines at Maker Faire Atlanta. That’s a bit to accomplish in a short period, but historically August to October is my most productive garage time of the year, so here’s hoping.
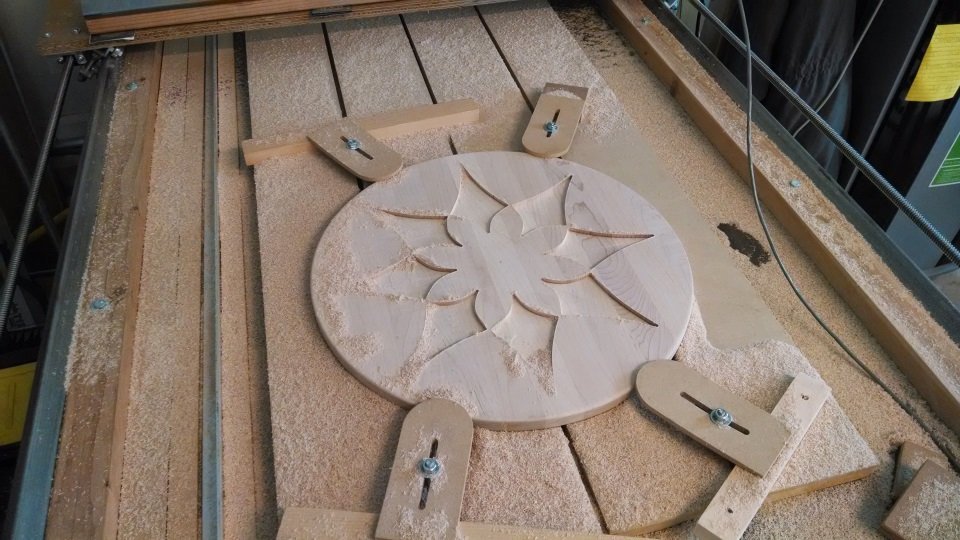
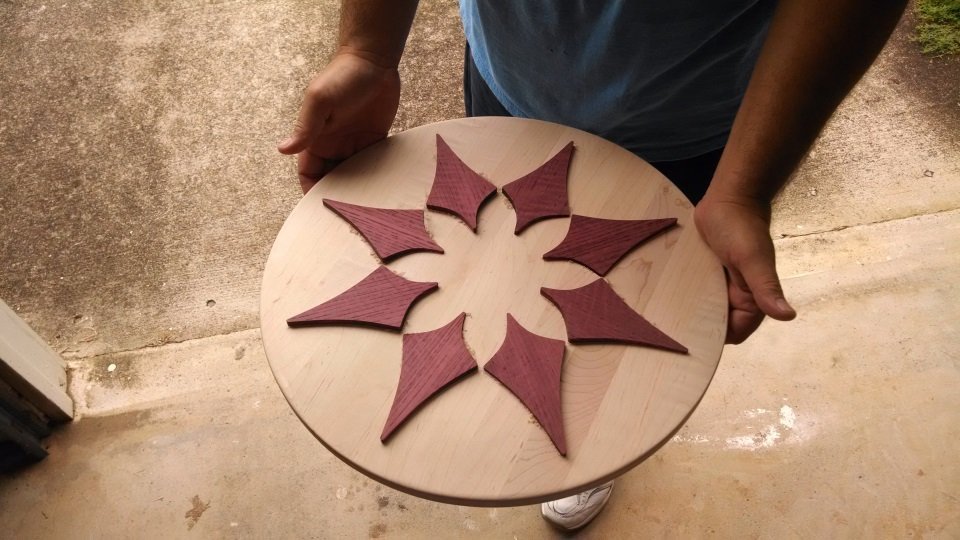
Cutting inlays from Purple HeartCutting inlay pockets into maple Clamping table and hold downsInlays sitting on pockets
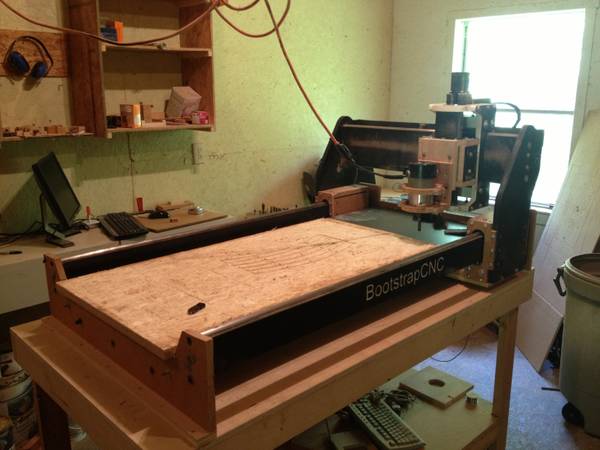
So having finish the machine I started a little over year ago (2 Years Later…), I thought I would do a quick retrospective to close that project out so I could start the next one clean.
The Good:
Finished Machine – It took me a while but this is the 5th machine I have built.
Rails worked well – I had a few issues with the bearing rising up while traversing the rails, shimming to make them parallel and adjusting the bearing tension got this under control, thought the z still rises a bit at the very top. I think this would be less of an issue if I made another set, my method of construction has been refined to produce better results.
Clamping table and table leveling worked well – I opted to create a clamping table from MDF, used only the table saw and 1/4″ spacers to separate the planks. Leveled the table with a 1″ flat bit and glued 1/4″ layer of MDF to the top. The idea is that when you scar up the table too bad, you re-level it and glued another layer of MDF on top. Got this idea from a video CNCNutz posted on YouTube.
Z Axis worked better than I expected – Ended up being much simpler than I expected and very sturdy (for wood).
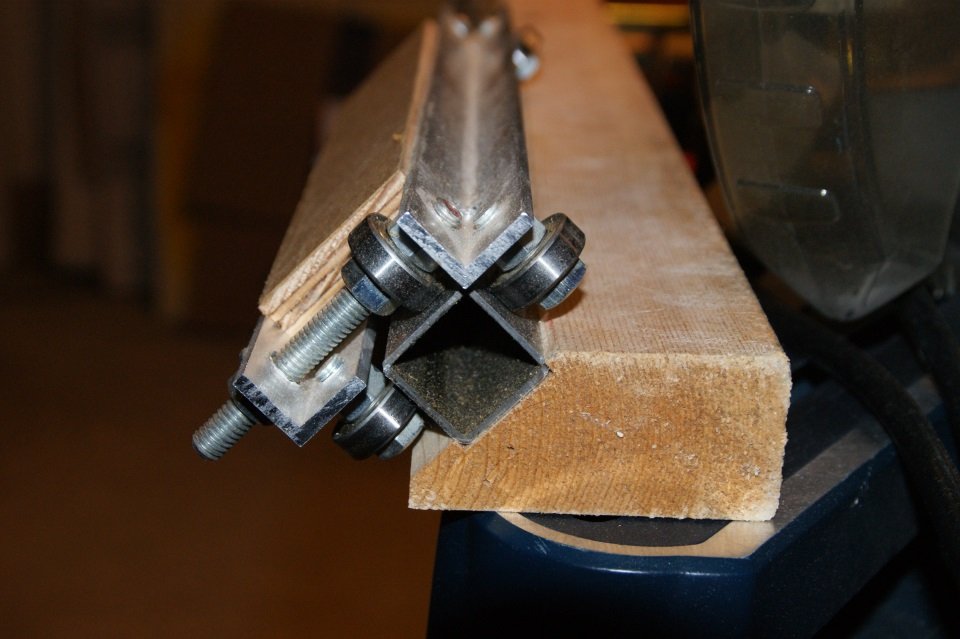
Aluminum angle for lead nuts worked well – They were a little difficult to make, but the 1.5 inch aluminum angle I used for lead nut mounts really worked well.
Strongest machine I have build so far – The machine is very sturdy, very little flex in the z axis compared to all of the other machines I have built. Due to the 1 piece design of the gantry, less likely to break something if long axis starts to rack which happened a few times while tuning the machine.
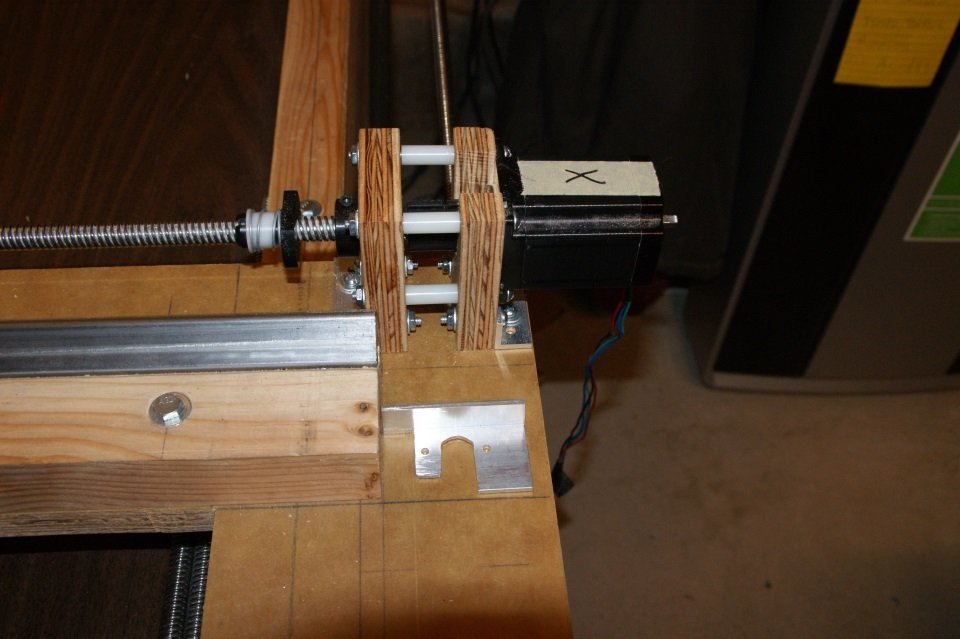
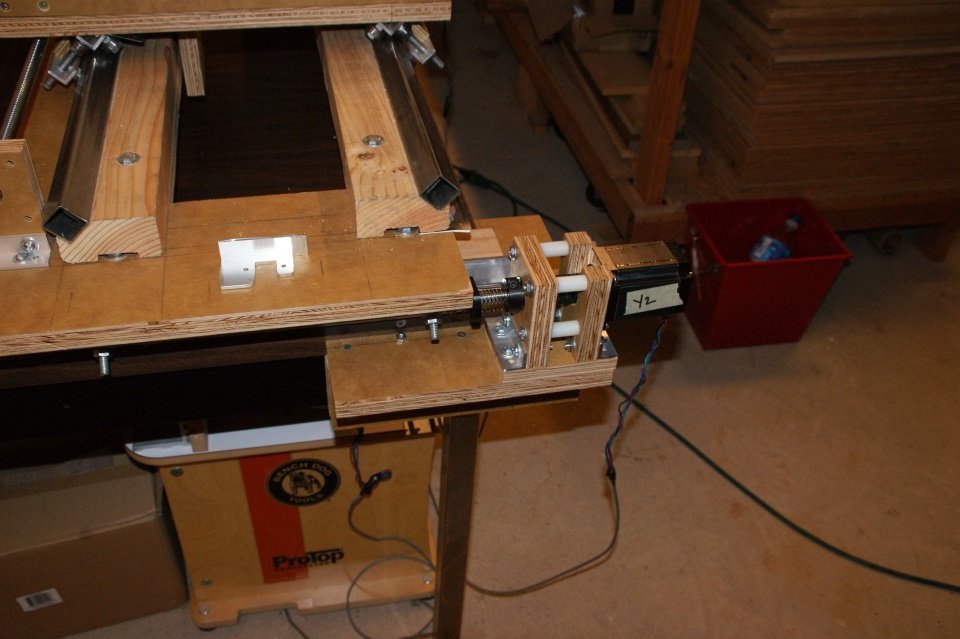
Better Rail 1Better Rail 2Gantry Motor and Lead Nut MountShelf Mounted Motors
The Bad:
Didn’t post much about it – posted a few YouTube clips (they are pretty awful) and slapped them on the end of the previous post (2 Years Later…), but didn’t post any other progress reports.
Rail didn’t work so well for Paul – My friend Paul tried a variation (different way of adjusting tension) of the bearing design on a 4×8 he was building and had issues with the bearings rising as they moved along the rail. His design was quite different and the 1″ square tube was less perfect than what I got from the big box store. I ended up recommending he go with a more traditional (commercial) bearing and rail since it was for use in his business.
Tuning of long axis- Had issues tuning the long axis, I was able to run 1 side at 120ipm without any issues, but the other side kept stalling, ended up being different power settings on the motor drivers.
Could have made mounting the motors easier by extending the side of the table – I built these shelves to mount the motors and bearings on, I later realized it would have been much easier to extend the table width with a spacer under the long rail.
Lost x/y size due to motor mounts – Didn’t put enough thought into the lead screw and motor mounts, had intended to have the gantry and carriage pass over the motors, but there was not enough clearance so I had to settle for ~22″ x 44″ instead of 24″ x 48″ (with lead screw travel to spare). Would have noticed it if I had modeled it in Sketch Up first.
Vacuum/dust attachment is problematic – I made a simple dust attachment for the machine, but I lose y travel when using it. Due to the limited space between the table and the bottom of the gantry and the design of the gantry other options are limited.
Conclusion:
The machine works, I would say that it is better and simpler than the 2 others I designed. I think the rail concept, while not super easy to make is worthy of further development. But I still think I can do better.
So I sort of disappeared for a while, it has been about 2 years since I have posted anything but I have been working on and off on the machine and I did eventually finish it. But before I finished it, Joshua Updyke ran a class in Mexico that built a version of the machine. They has some success, but I am not sure they got it fully running in the little time they had to build it (I think it was a week). Here is link to some pictures they took during the class.
Then a friend of mine at work suggested I make one for a friend of his who was just getting started in DIY CNC. Life was hectic for a while so it took me a few months to finish assembling my machine and then I tried to quickly cut out the pieces for Paul’s machine. Well apparently my machine was not quite square, so the new machine had some issues with squareness and overall Paul was unhappy with it. Beside the squareness issue it also had a lot more flex than he was willing to deal with, it was hard to adjust the bearing tension and a number of other things… he did a number of modifications and managed to get a machine that while not perfect works for him. Paul builds quality stuff for a living and expects/needs his tools to work well, were as I build things to play with as a hobby and am happy if they work sort of well so part of the issue is one of expectations.
Completed 2×4 BS1 MachineModified 2×4 machine built by Paul.
While this was going on I started working on a hopefully more robust 4×8 machine for Paul based on some other ideas I had, and we spent a number of Sundays working on it before I got busy with personal stuff and then winter set in. In the meantime Paul was using the 2×4 machine and mentioned that we was getting a lot of wear on the gas pipe rails, so I started thinking about other rail and bearing designs with the goal of using a better rail material, simplifying the bearing construction and allowing for easier tension adjustments.
I am in the middle of building a replacement for the Black and Yellow Beast. I finished this machine less than a year ago but I made a number of improvements in the redesign and I am really happy with the way the BS1v2 (son of the beast) came out, so out with the old. This also gives me another chance to verify the design before I release it.
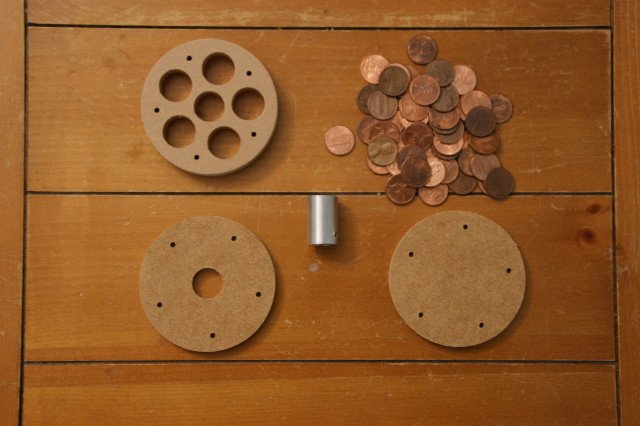
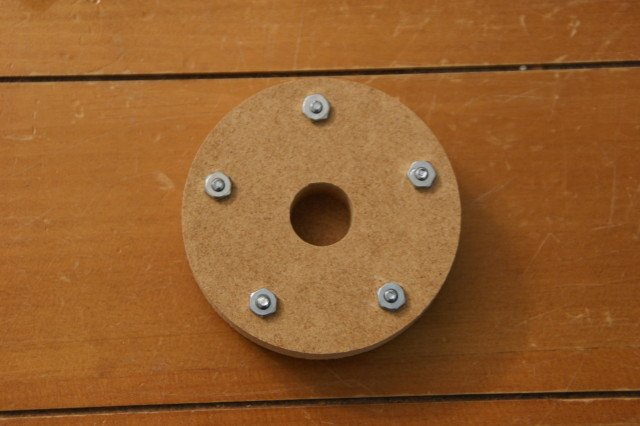
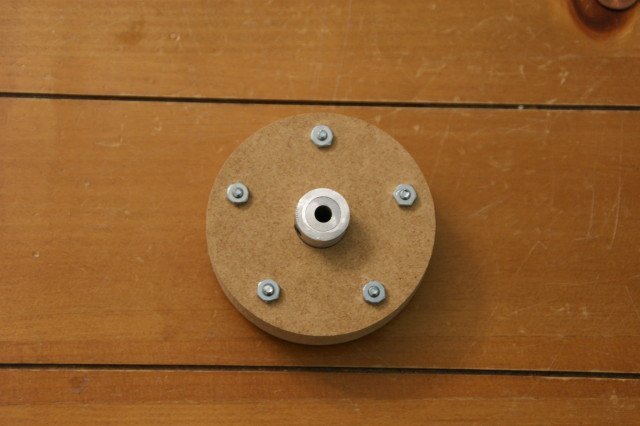
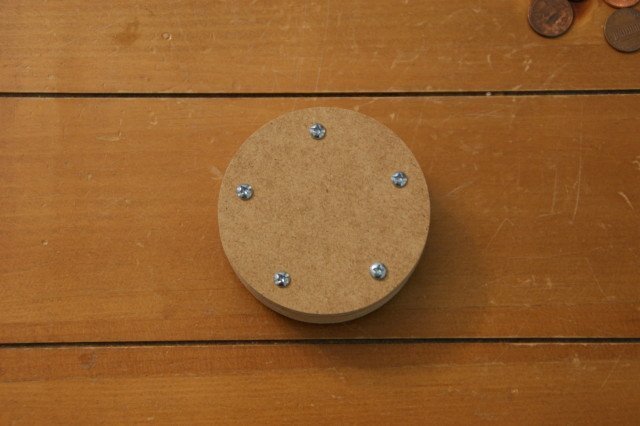
So anyways, I was over at cnczone.comsoliciting recommendations for replacement screws and the subject of dampers came up. Having read cnczone for the last 3 years, I have seen dampers recommended a few times to help improve the speed at which a machine that uses stepper motors and lead screws can run, and although I thought my machine should be able to run faster, I never wanted to exert the effort to make a set.
This time was no different, but then a random thought crossed my mind about using pennies in place of the 1/2″ slugs (which have to be cut, hence the effort I was trying to avoid), and it didn’t seem like that much work after all.
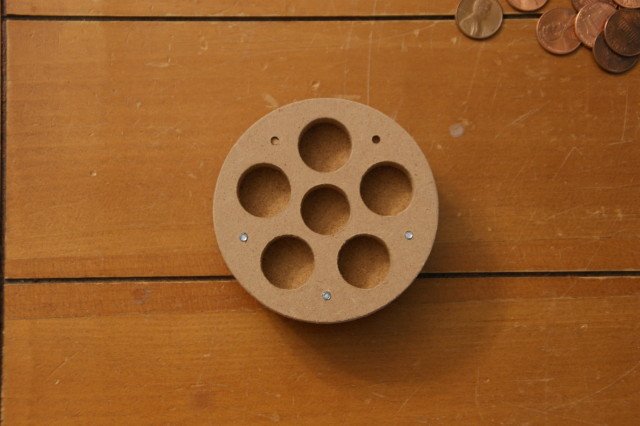
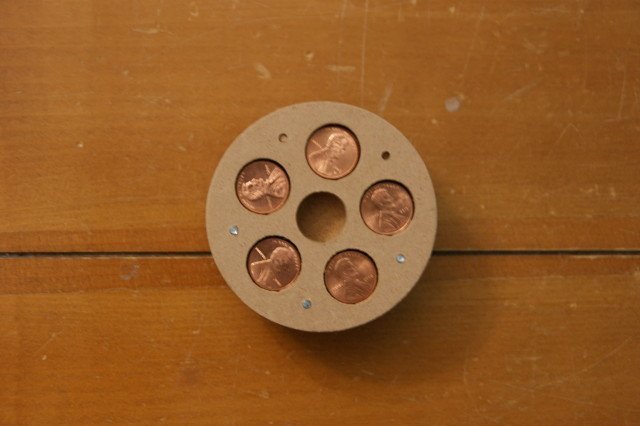
So here is my “Penny Damper” design for your consideration.
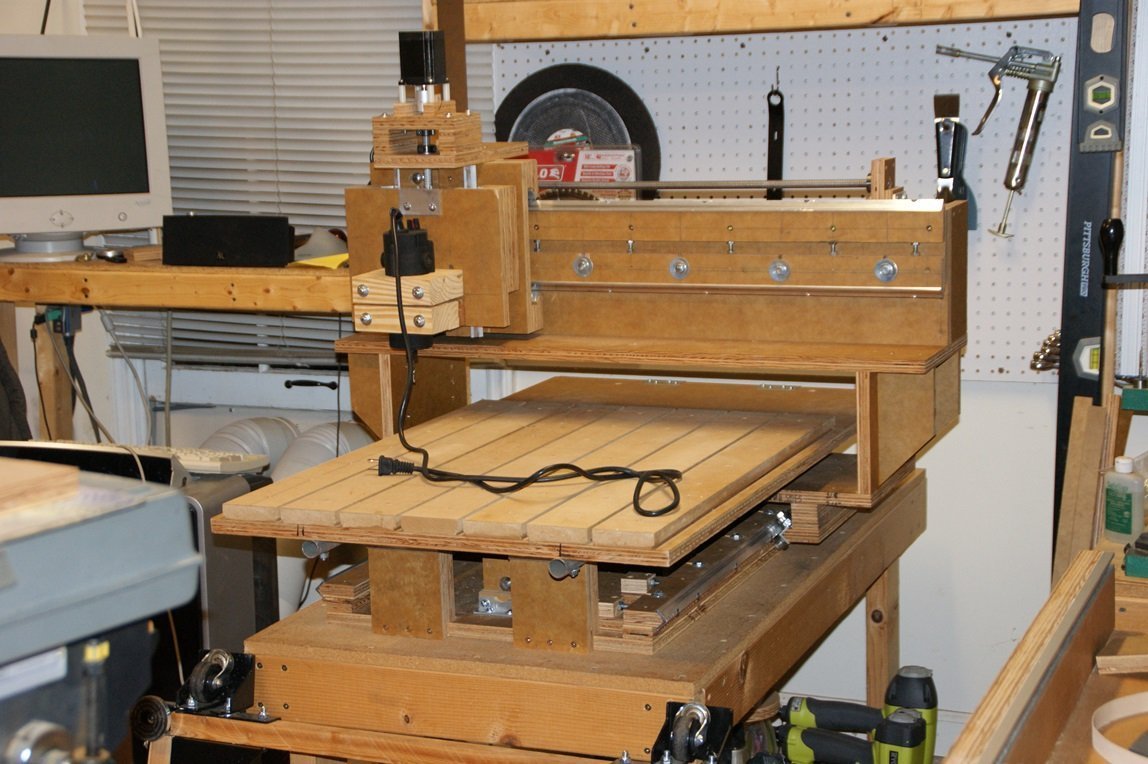
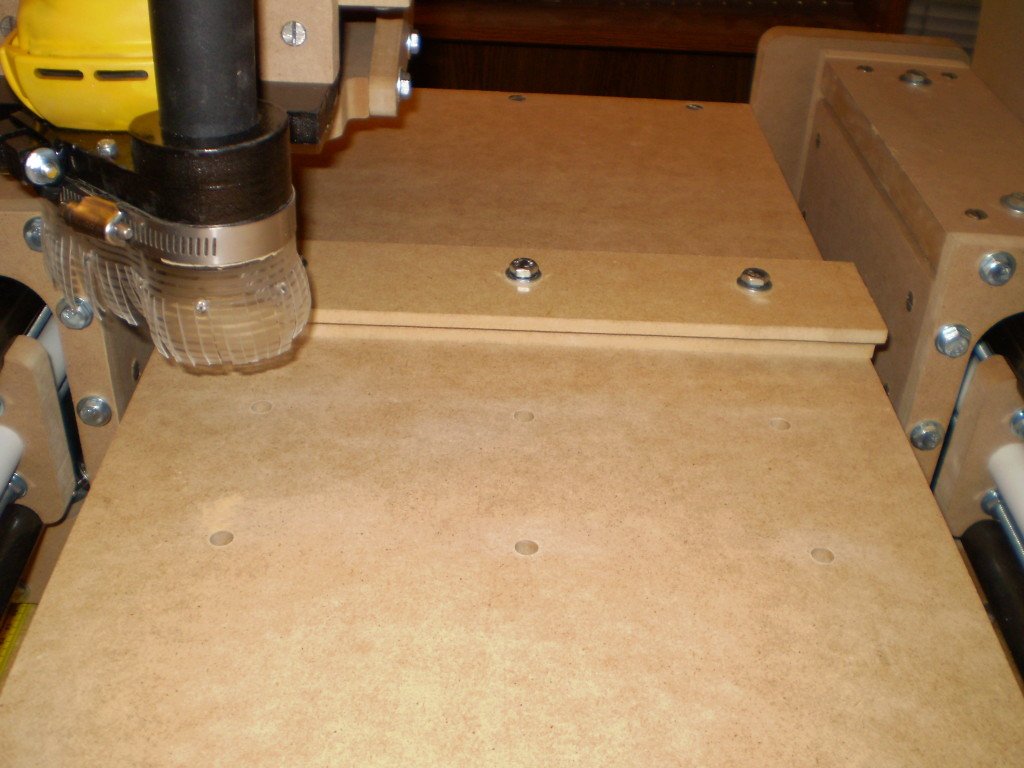
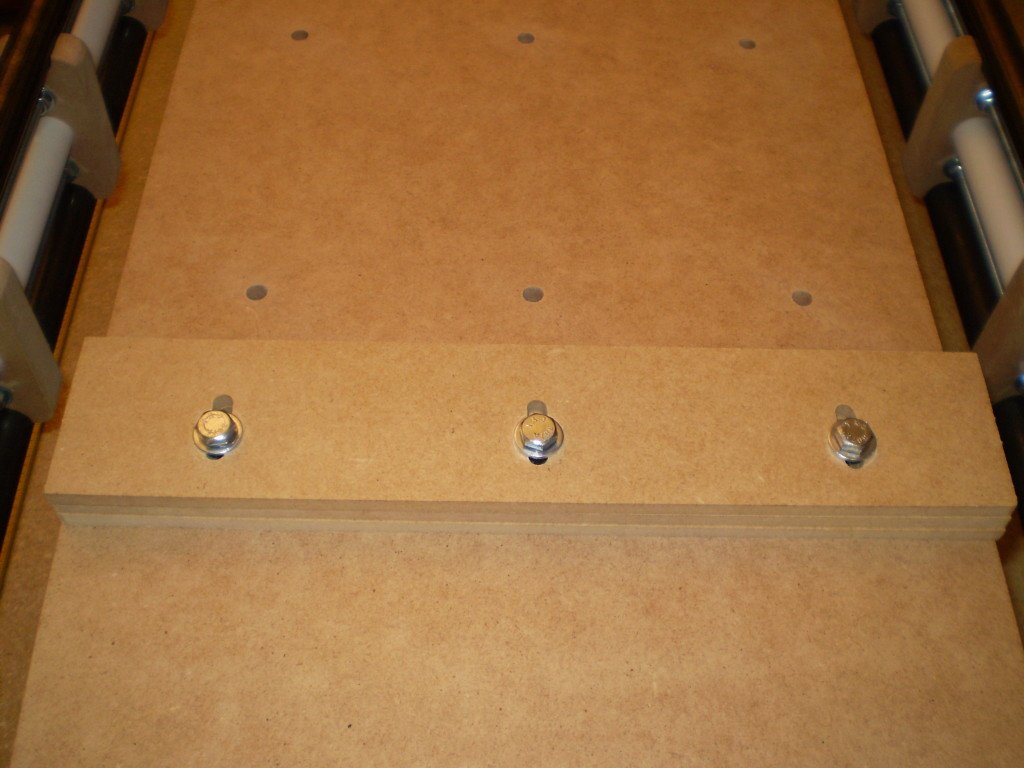
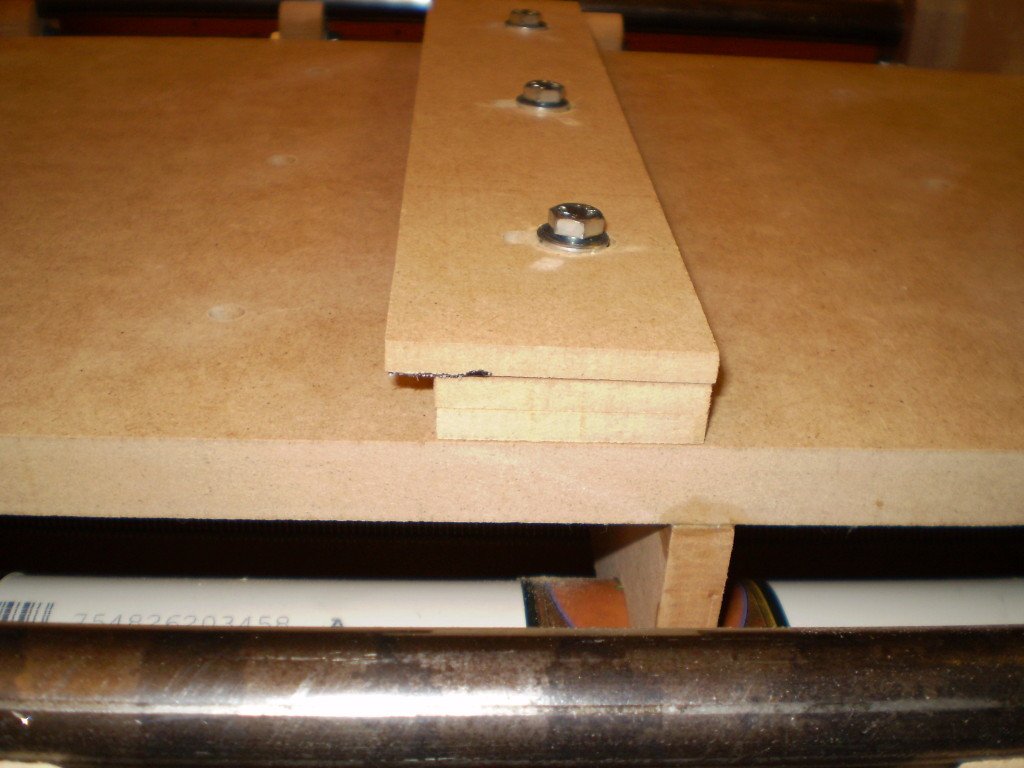
Well it’s done… well as done as any DIY CNC can be. I really only had to solve the clamping issue and figure out what to cut the last time I posted. The clamping issue was solved by drilling a pattern of holes in the table that I thought would cover most thing I would be cutting (size of material) and using T-Nuts to provide a place to bolt down some simple brackets.
T-Nuts under table
Top hold down
Bottom hold down
Hold down – side view
The brackets are made of 1/4″ MDF and you basically adjust the height by adding or removing pieces to match the height of the material, I plan on cutting some 1/2″ and 1/8″ pieces to give me a bit more flexibility in matching different material heights. They worked fairly well, but I am going to add a small lip to them to provide a bit more bite so I won’t have to tighten them down so hard to get a good hold.
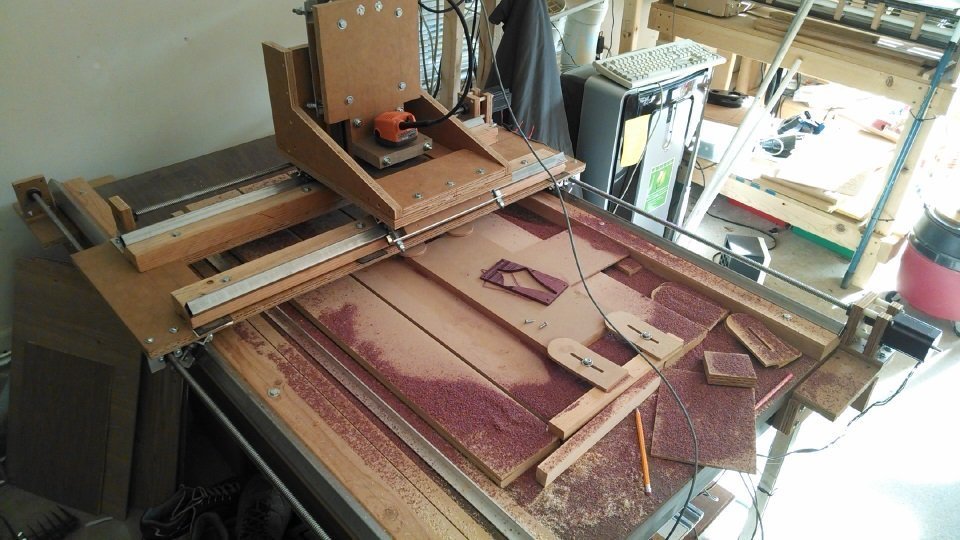
The next thing I needed was something to cut, however since I am not starting a new machine (yet), I was at a loss. My wife came to my rescue by asking if I could make a a replacement part for the Jenga game my kids got for Christmas. The original version of the game came with a nice plastic sleeve to help set the game up, but the newer versions come with a cheap and fairly useless cardboard sleeve. A few quick measurements and 15 or so minutes in CadStd yielded a nice replacement, and my first cut video.
I am in the process of cleaning up the cad files a little bit, but my next post be about releasing them to public, just need to figure out what license to use. I am also trying to convince myself that I want to offer kits, but I am apprehensive of such a commitment of my time. Maybe I’ll have it figured out by the next post.
So right after the last post I did a bunch of work in about two weeks and was to the point were I was just about ready to run, and then nothing… this update has been sitting in draft mode for 2 weeks so I decided to force myself to finish it tonight, so here we go.
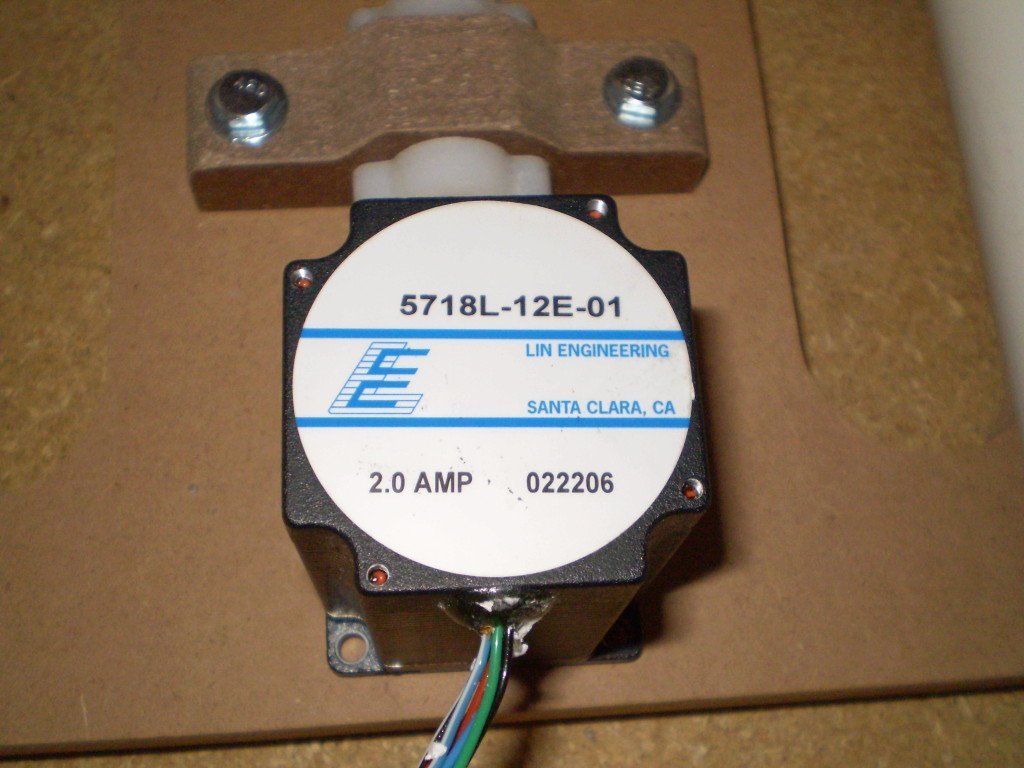
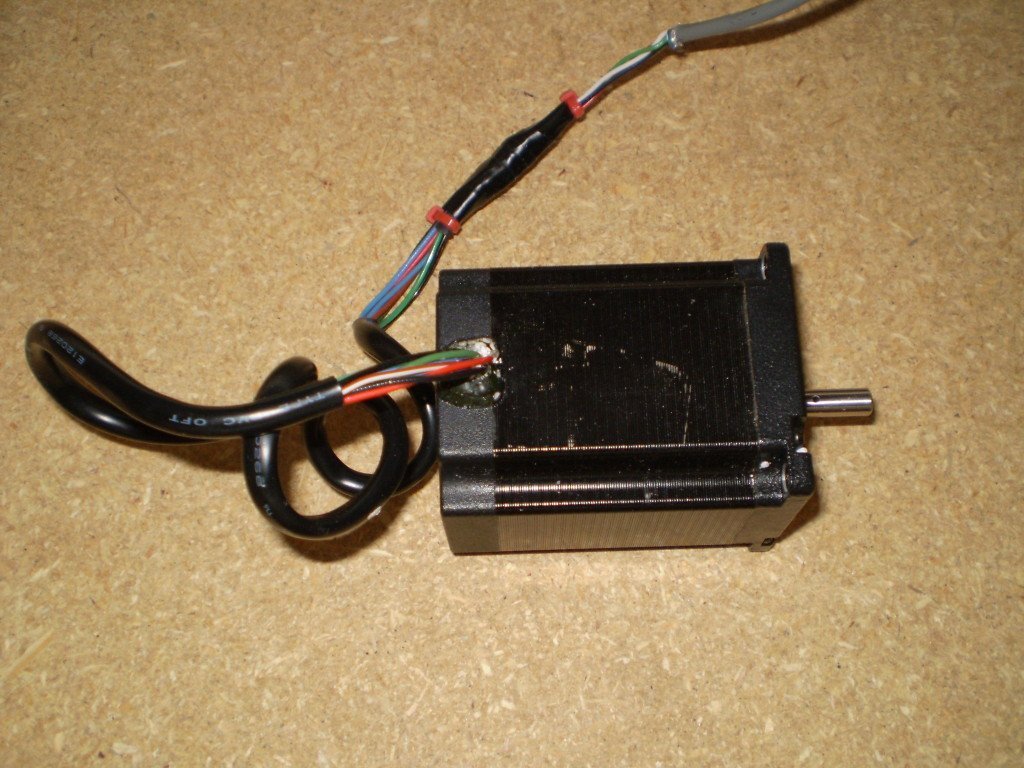
The first thing I decided I needed to do was to wire up and test the surplus motors I bought. I used 22ga 4 wire security system wire I found out home depot, I used this wire on my two previous machines without any issues. Using the documentation over at the Lin Engineering site, I was able to easily wire the motors up as bipolar parallel.
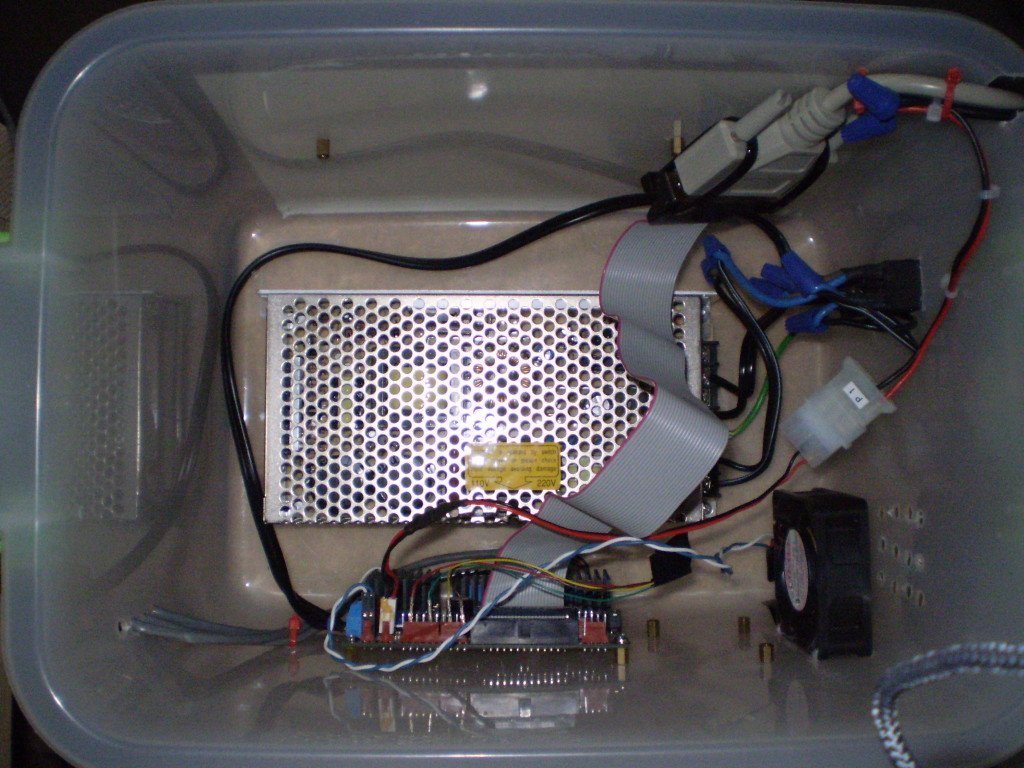
Then with a bit of remorse, I reclaimed the electronics from the Rockcliff Mini Model D, removed the extra parts (4th Axis – Probotixside step and MDFLYbreakout board) and wired it all up to the remaining Xylotex 3 Axis controller. After making the necessary changes to the EMC2 configuration, I ran a few quick tests and everything just worked… this is the first time that has ever happened, but I guess 3rd time is a charm after all.
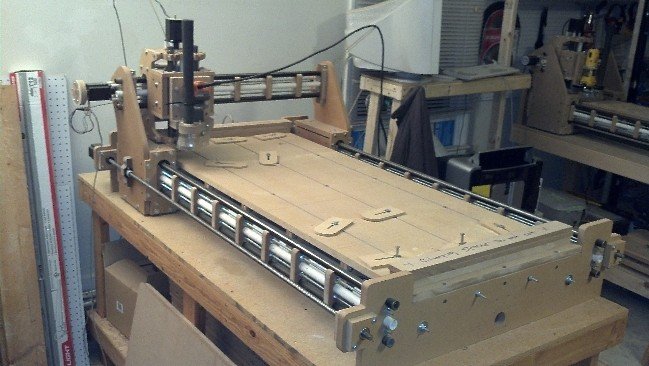
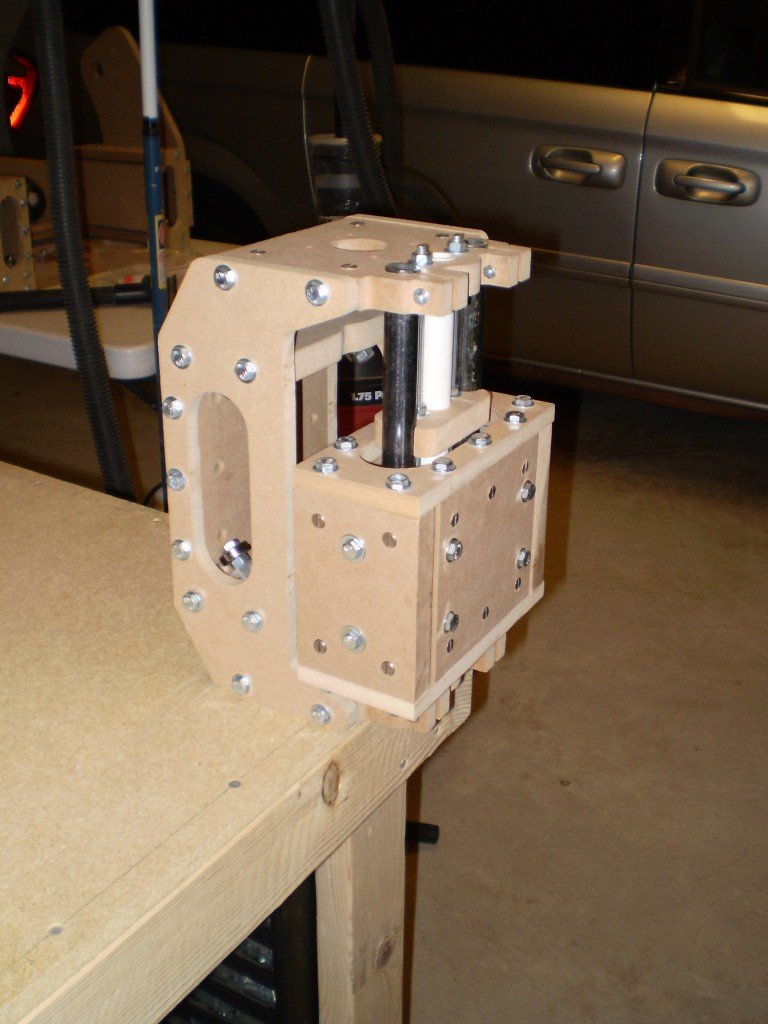
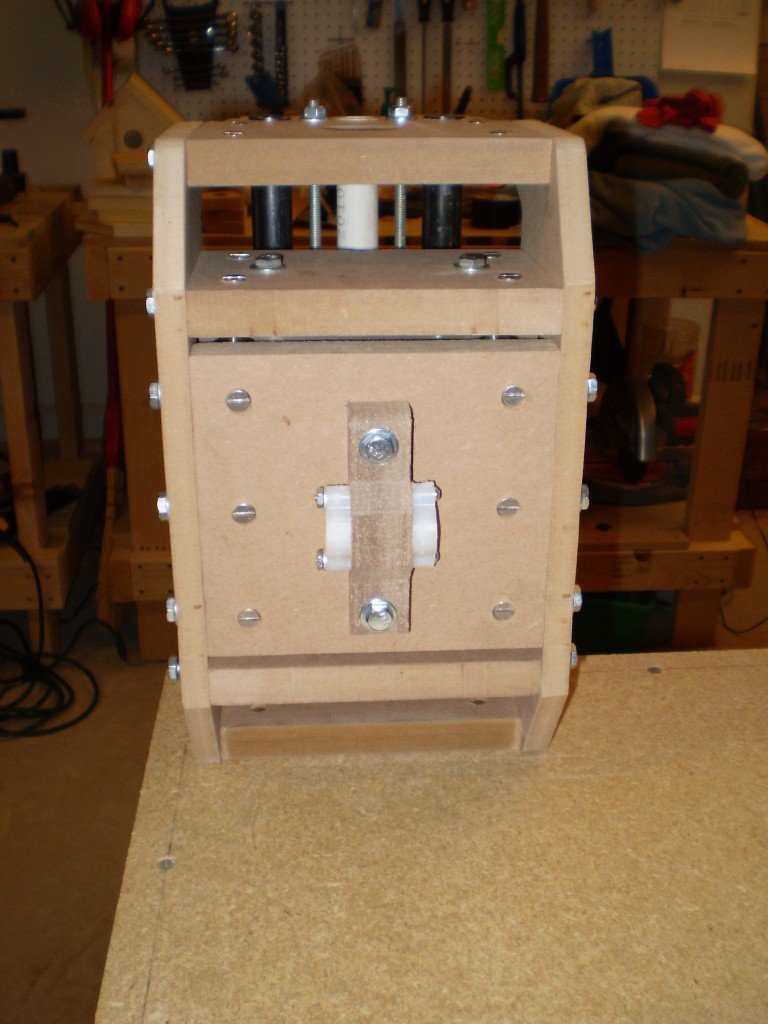
Well while things are still moving slowly, it is blazing along compared to the previous build. Two weeks out and I have the main part of the machine assembled and only need to add the motors, lead screws and cutting tool before I can wire it up and run. I am not going to say much else, just take a look at the pictures and video to see where things stand.
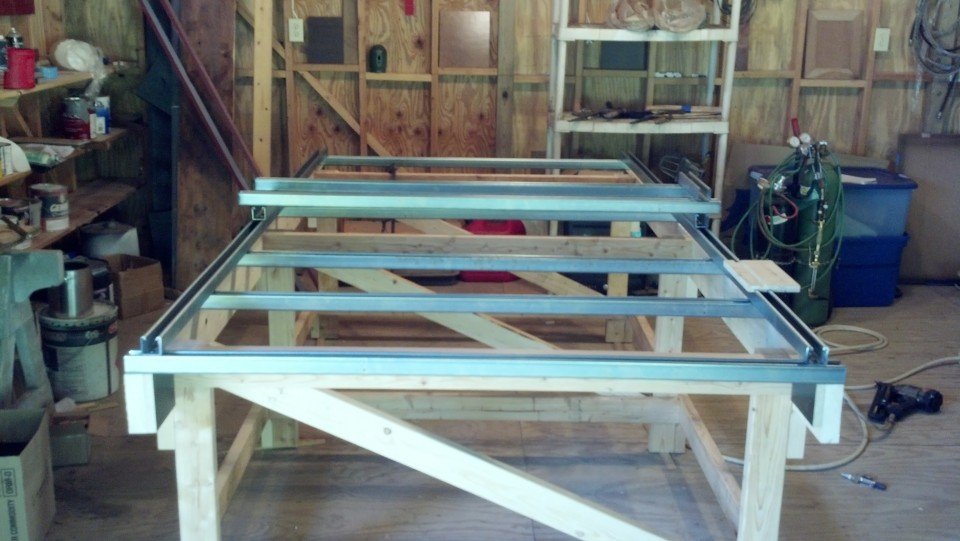
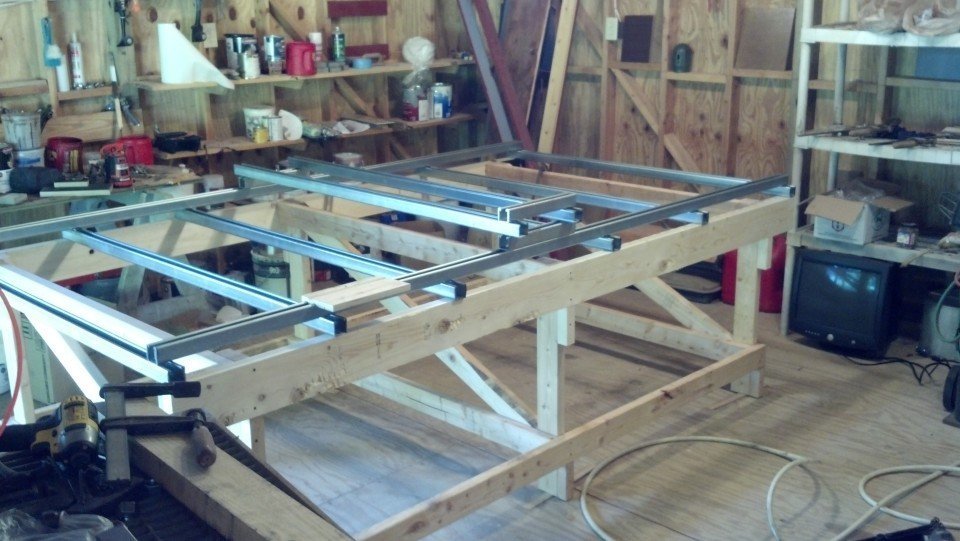
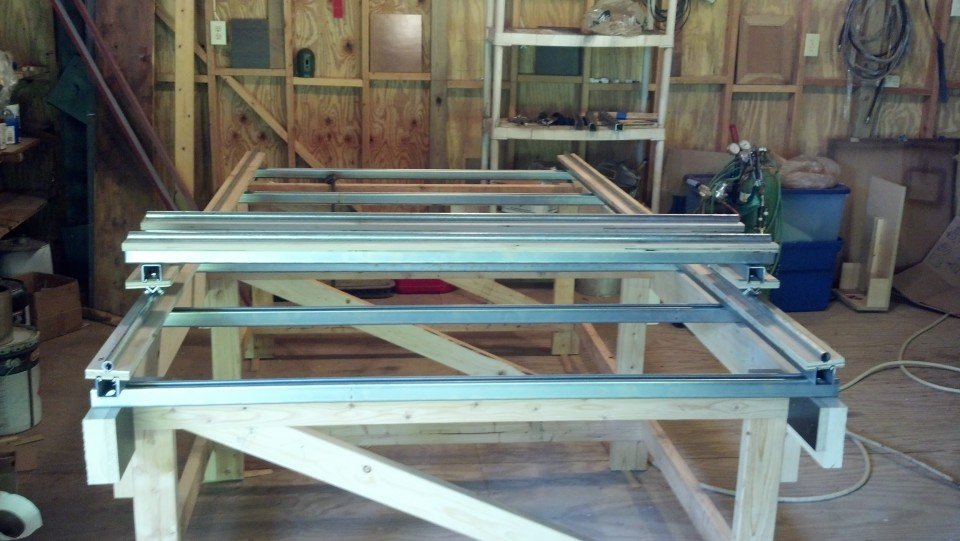
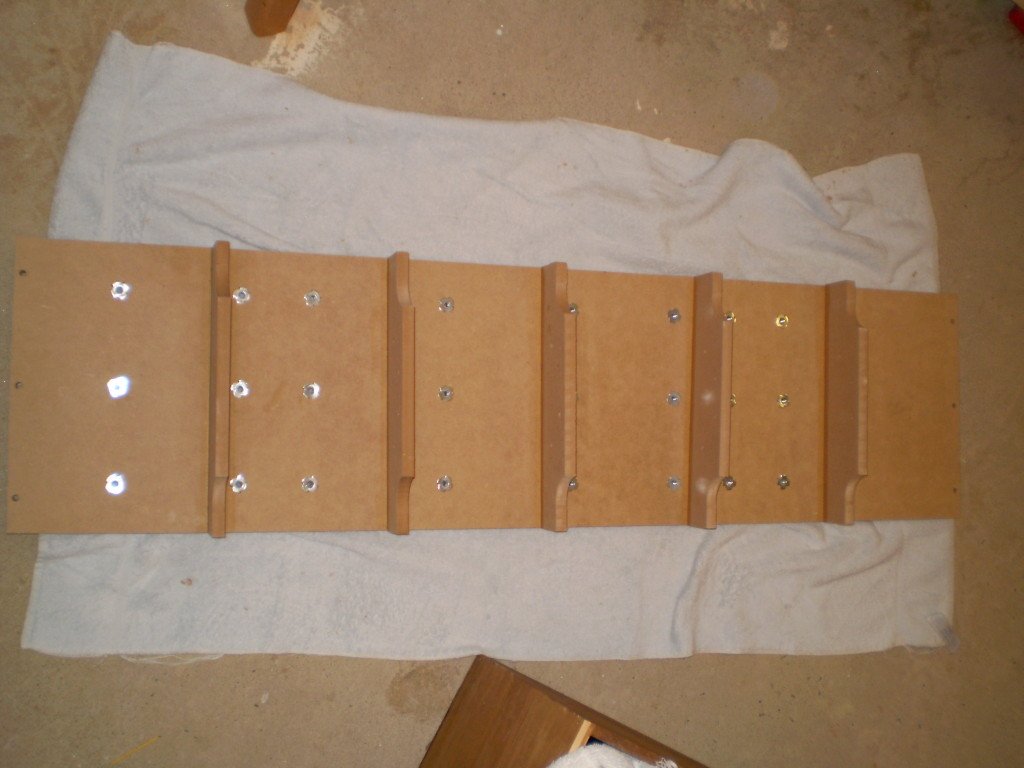
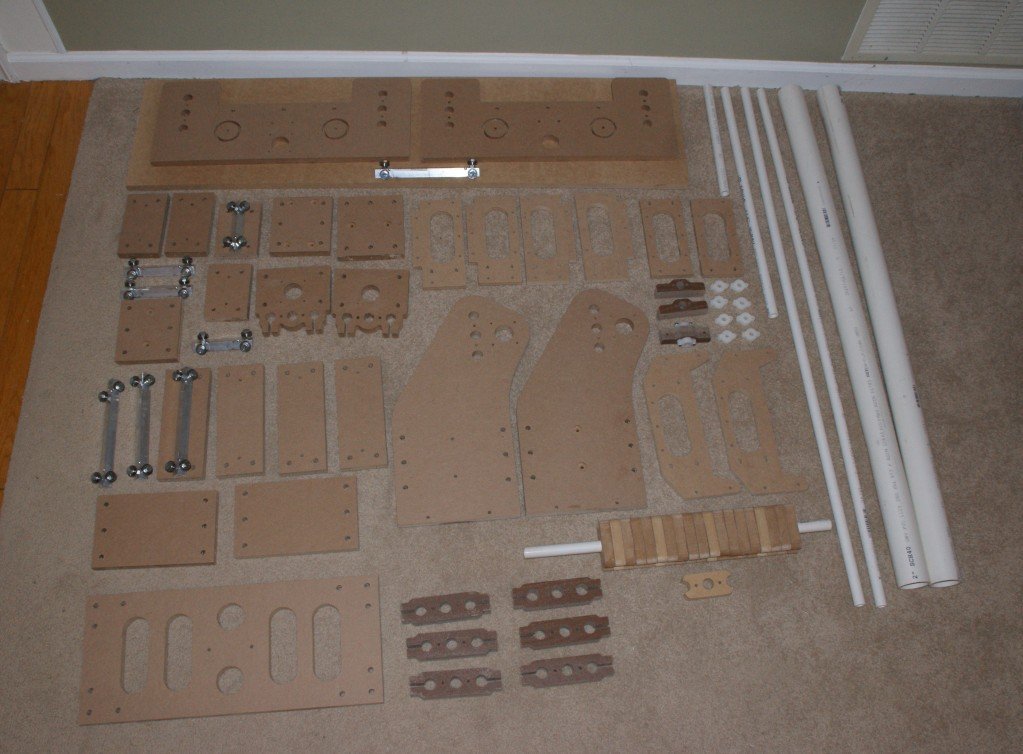
Hard to believe it’s been two months, but the holidays are crazy and the cold set in a bit sooner and harder than is normal for Georgia, so my days in the garage have been sparse (I know excuses, excuses…). But I have made good use of the time I have had and I am happy to announce that all of the parts are cut, drilled (~100 cross dowel connections), and ready to assemble.
This is my first time going from a 3d drawing to a physical machine, which very exciting for me. I expect things should move relatively quick from this point on, since I believe I have everything else I need. I may decide to buy some new motors rather than pulling the ones off the Rockcliff Model ‘D’, as they are only 116oz and I was planning on putting 2 on the X axis to handle moving the gantry, it would be a lot easier with just 3 more powerful motors.
Hopefully I will make enough weekly progress to make posting worth while, this should not take more than a month even for me.
Here are a few pics of the parts waiting for assembly… Let it begin… let it begin!!!
It has been a month since I did my first cuts with the new machine, and yet those very cuts were already the start of the next machine.
I started by creating a new cad project and importing all of the pieces that I felt worked from the old project and then began modifying them to eliminate things that did not work as well as I would have liked. I then proceeded to make a number of changes I thought would make the machine better and easier to assembly. I think the results are a little mixed, I really like look of the new design, and I think it will be easier to assemble and more sturdy overall, however I nearly doubled the number of cross dowel connections being used which adds complexity to the production and build process.
I decided to make another attempt (my 3rd) at using Sketchup to assemble things in 3d to try and catch any errors before I start cutting. And thanks to a Goggle search which turned up this blog entry: In Sketchup… How to Import & Trace 2D CAD Drawings, and another 9 months experience playing around with cad programs it actually worked this time.
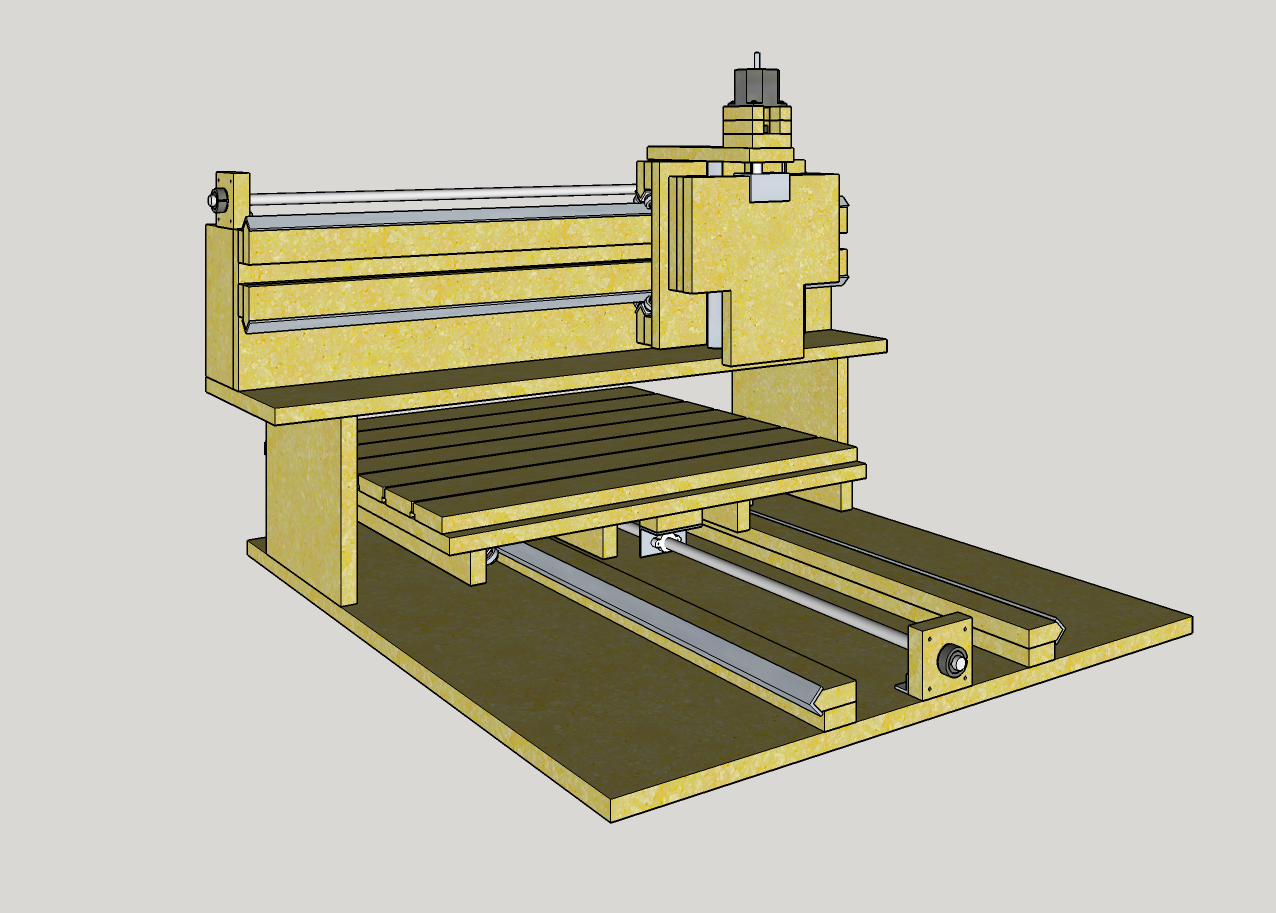
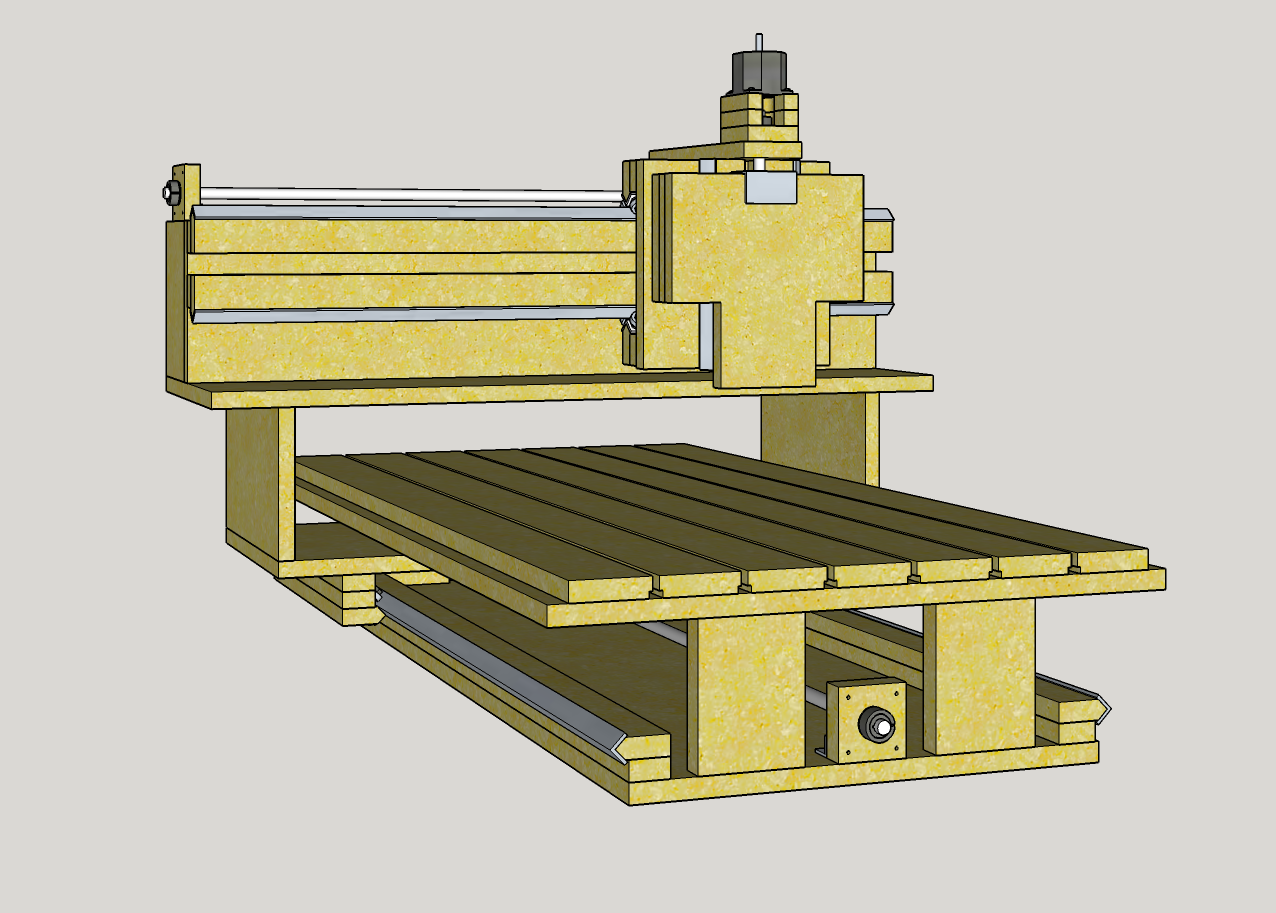
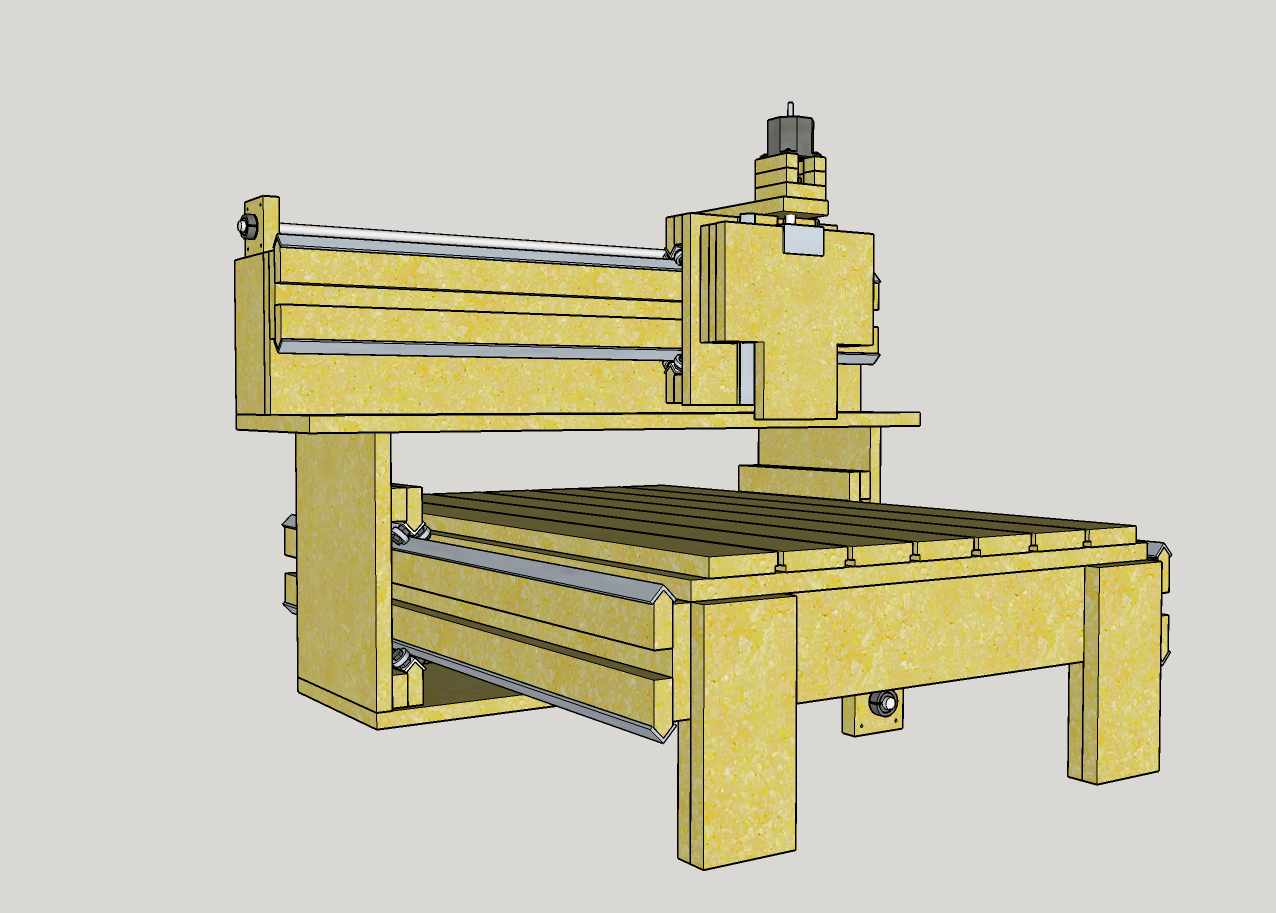
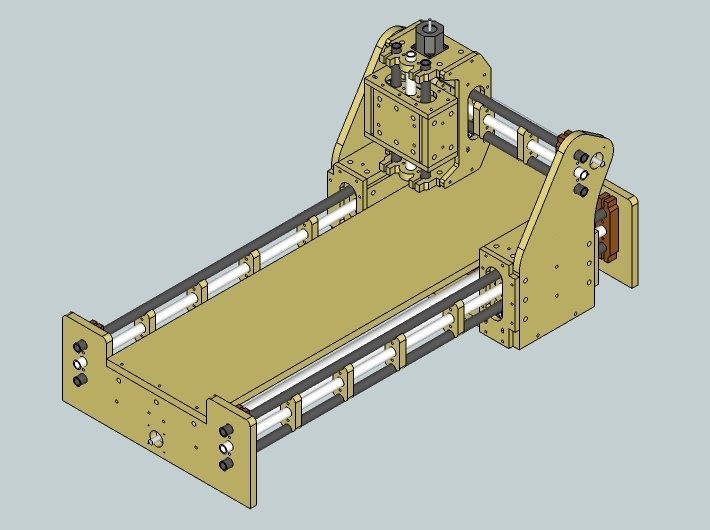
BSR1v2 – ISO
The machine was designed with a 24″ x 48″ cutting area in mind, but it should be easy to build up to a 24″ x 60″ cutting area (~36″ x ~72″ foot print), the one shown has a 12″ x 36″ cutting area with a foot print of ~24″ x ~48″.