I am in the middle of building a replacement for the Black and Yellow Beast. I finished this machine less than a year ago but I made a number of improvements in the redesign and I am really happy with the way the BS1v2 (son of the beast) came out, so out with the old. This also gives me another chance to verify the design before I release it.
So anyways, I was over at cnczone.com soliciting recommendations for replacement screws and the subject of dampers came up. Having read cnczone for the last 3 years, I have seen dampers recommended a few times to help improve the speed at which a machine that uses stepper motors and lead screws can run, and although I thought my machine should be able to run faster, I never wanted to exert the effort to make a set.
This time was no different, but then a random thought crossed my mind about using pennies in place of the 1/2″ slugs (which have to be cut, hence the effort I was trying to avoid), and it didn’t seem like that much work after all.
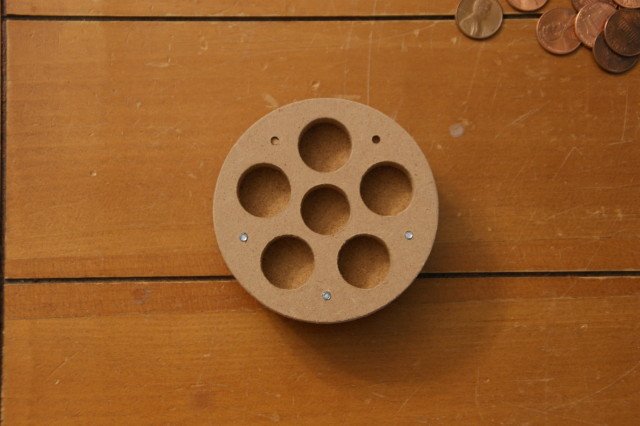
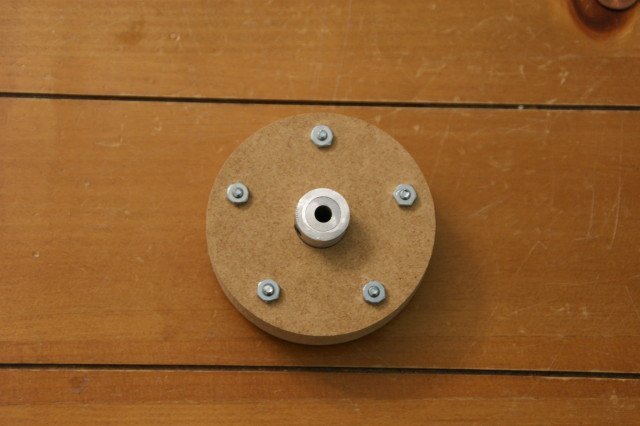
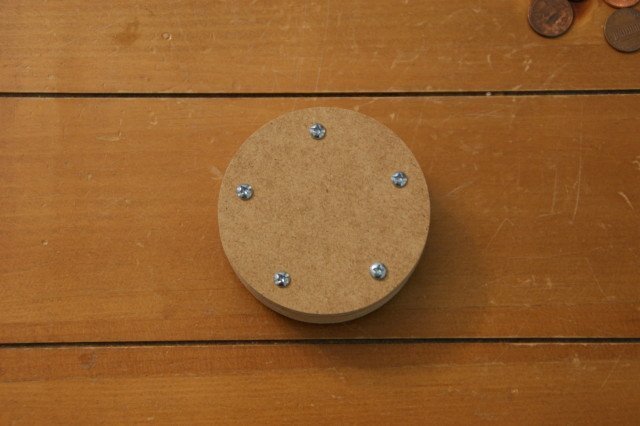
So here is my “Penny Damper” design for your consideration.
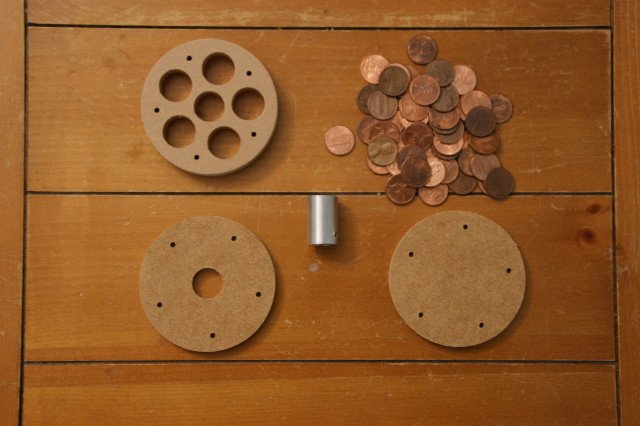

There is a page on Inertial Dampers on the Solsyla site that explains the issue and shows several damper designs. And if you hunger for even more information be sure to search the cnczone forums for “dampers”.
Here is a link to a zip file of all the files I have for the Penny Damper, dxf, cut2d, and nc: http://grumpygeek.com/downloads/PennyDamper.zip
And finally, here is a not so short YouTube video:
These will be probably installed on the new machine unless I find they really are not needed, I am sure I will post about it when I get there.
Pingback: Help with drive component upgrades - CNCzone.com-The Largest Machinist Community on the net!
Hello,
Thanks for sharing this! I have watched the video, and since my English is a little rusty I want to make sure I did understand correctly: is it right that you were usually running the machine at around 32 ipm, and now you can run at 60 imp?
Thanks
Hi Arturo,
I am currently running Y axis at 36 ipm, with the damper is looks like I can take it up to about 54 ipm. With how my machine is configure in EMC2 my adjustments are in 6 inch increments, the rule rule of thumb is to find the max your machine can run at and back it down a bit for reliability, in my case that would be -6 ipm, also since I do stall occasionally at 60 ipm, 54 ipm should provide a nice safety margin.
Nice solution. Glad you showed before and after video (though not in that order).
Thansk, that is pretty good anyway… 50%… I will have to investigate the dampers idea as you suggest for my machine…! thanks a lot!
I was curious about how the rotary pendulum damper would work, and I found this link:
http://www.modularrevolution.com/forums/showthread.php?p=46298
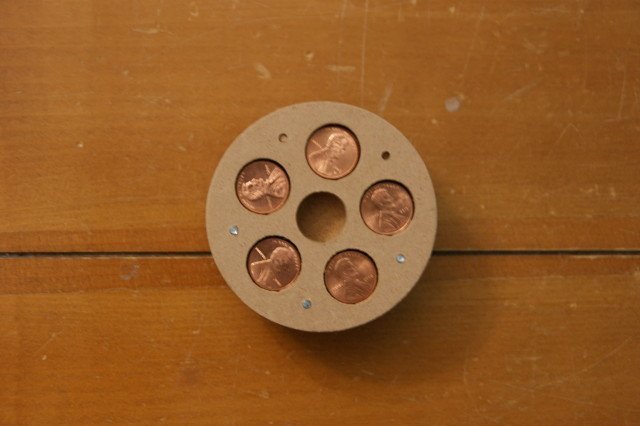
If it still works, at the top there is a picture of the innerds of the rattler. The weights look to have about 1/3 of their diameter added to their respective holes to give them room to move. If the weights had no room to move, you would just have a composite flywheel, but that’s not what you want. I suspect that speed throws the weights out to their furthest radial distance from the center. as long as movement is smooth, they tend to stay there. When a resonance tries to change this smoothness, energy has to push the weights toward the center. This eats energy, but when the smoothness comes back that energy is returned. Looking at the size and weight of the rattler (used to balance out a large heavy V-8 engine, I suspect the pennies and diameter you are using is overkill. If you are willing to try a few iterations, I would suggest #4 washers in holes big enough for #6 or #8 washers. If you just want to try and get better performance from the one you’ve built, I suggest holes with more room for the pennies to move.
That’s a great link, thanks for posting it.
I figured they might be a little large, but they do have a positive effect. At slow speeds I can watch the actions of the pennies and it is pretty much as you describe. After I finish my current project I may go back and try increasing the hole size and see if it works any better. I modeled these after a design that used a very small gap, they must have had a reason for it, I’ll have to go ask. I may try using some small washers, but it is hard to argue with the cost effectiveness of the pennies.
The dampers really seem to improve the performance with your leadscrew machine. Have you ever considered going to a Rack & Pinion setup? Also I noticed that the machine stalls near the end of travel and as you move at higher speeds. This and the loud sound you made at the right side of your travel indicate that you have a misalignment along the length of travel. I suspect the anti-backlash nut is pinched near the left side and pushed on the right side.
Bill
They do seem to help a bit, I have not tried to improve on them yet but might in the future. If I go any larger them my current setup, I will probably go with rack and pinion, but a 2 x 4 foot working area is plenty big enough for my needs at the moment. You are right the machine in the video has some issues near the ends, but it is in the process being replaced at the moment, so hopefully the new machine with correct this problem… if I ever get it done 🙂
What purpose does the PVC pipe through the middle of the axis serve? Just curious.
The PVC pipe is primarily used during the building of the machine to allow you to hold the pipe runners in place while building the pipe assemblies, it is also good for running wires for limit switches to the other side of the machine.
How is the coupler attached?
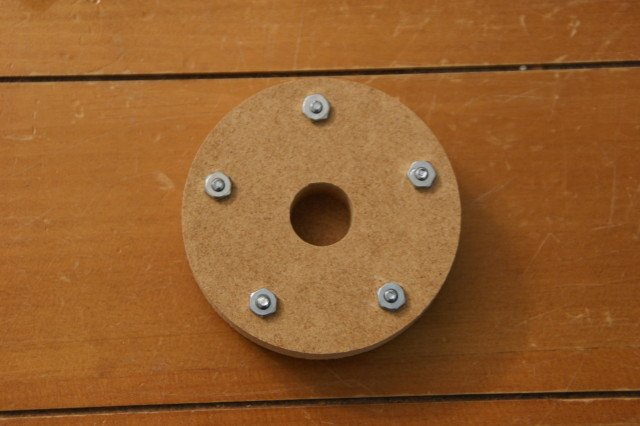
The end in the damper is just press fit in at the moment, it was tight fit (I can’t get them off without removing the cover and knocking them out) so I don’t think it is coming loose. The other end uses a set screw to secure it to the motor shaft. If I didn’t already have the couplers, I would have just used 1/4″ ID aluminum tube and added a set screw to the end, probably should have done that anyway, these couplers are a bit wobbly, which is why I didn’t use them in the first place.
Hey Don, I do not know if you are still maintaining this blog, but this happens to be the most recent one I have found on your site…
Anyway, I have what may seem to be an unintelligent question: I noticed the bearings mounted on a piece of angle for the “ways”, but I can not figure out how to mount the angle. Could you please email me a sketch or dxf of how to do this?
By the way, I downloaded your dxf for the DW660 mount, and Thank You! (It just so happens I am using that for my DIY CNC, and a Google search brought me here when i was looking for dimensions for the DW660.
Have you tried lubricating your leadscrew with sewing machine oil? I did it on mine and it improved the stalling problem.
Your vids are really interesting and it is my intention to try a similar flywheel damper to see if I can improve my machine further still. Have you experimented with different weights (numbers of pennies)?
I agree, the stalling noise is horrible – especially when cutting a part.
I haven’t tried machine oil, usually use teflon spray since it won’t gather dirt/dust like oil and grease… I would think white lithium grease do a good job as well. I haven’t played with dampers on the last machine since it can do about 120ipm without stalling and that’s about as fast as I want to go at the moment.
Really haven’t had much time to play with any of this lately, sort of depressing. 🙂