It has been a month since I did my first cuts with the new machine, and yet those very cuts were already the start of the next machine.
I started by creating a new cad project and importing all of the pieces that I felt worked from the old project and then began modifying them to eliminate things that did not work as well as I would have liked. I then proceeded to make a number of changes I thought would make the machine better and easier to assembly. I think the results are a little mixed, I really like look of the new design, and I think it will be easier to assemble and more sturdy overall, however I nearly doubled the number of cross dowel connections being used which adds complexity to the production and build process.
I decided to make another attempt (my 3rd) at using Sketchup to assemble things in 3d to try and catch any errors before I start cutting. And thanks to a Goggle search which turned up this blog entry: In Sketchup… How to Import & Trace 2D CAD Drawings, and another 9 months experience playing around with cad programs it actually worked this time.
The machine was designed with a 24″ x 48″ cutting area in mind, but it should be easy to build up to a 24″ x 60″ cutting area (~36″ x ~72″ foot print), the one shown has a 12″ x 36″ cutting area with a foot print of ~24″ x ~48″.
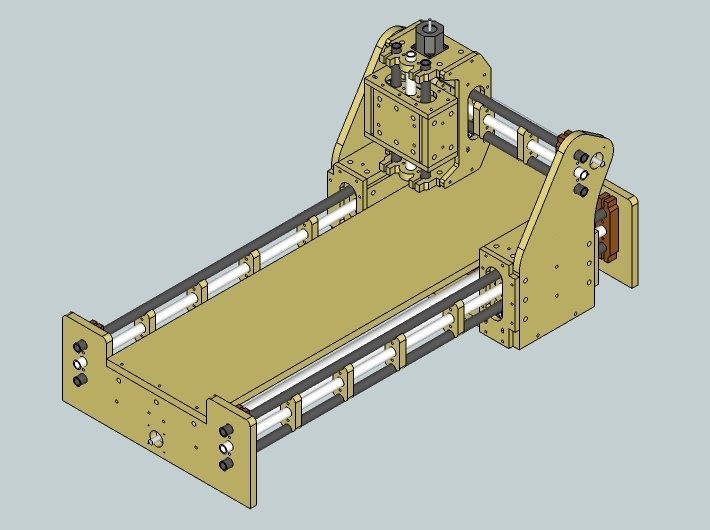
I have also used a combination of the Google SketchUp Web Exporter, Create Image ruby script, and tweaking of the javascript from the web exporter to create a rotatable 3d graphic to show off the machine, please take a look and tell me what you think.
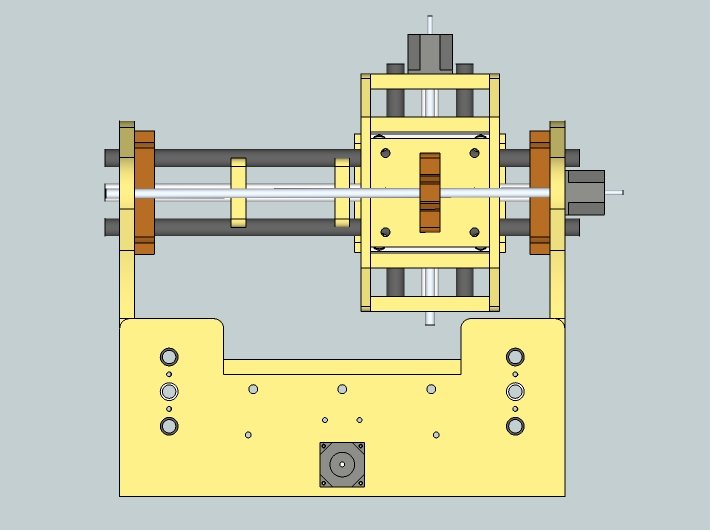
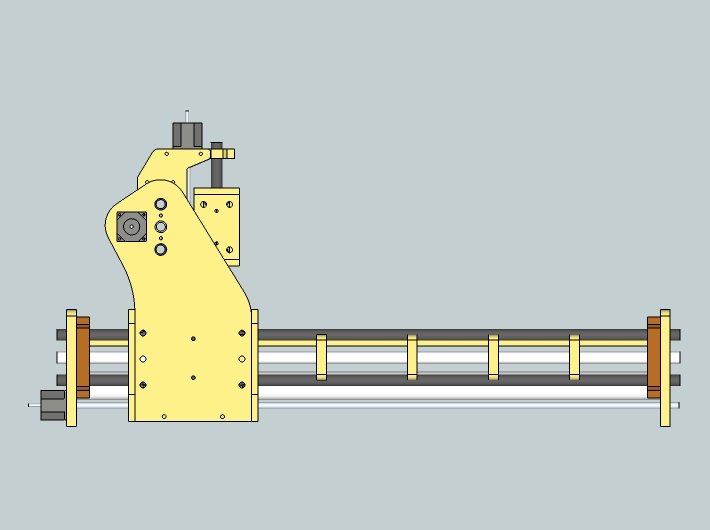
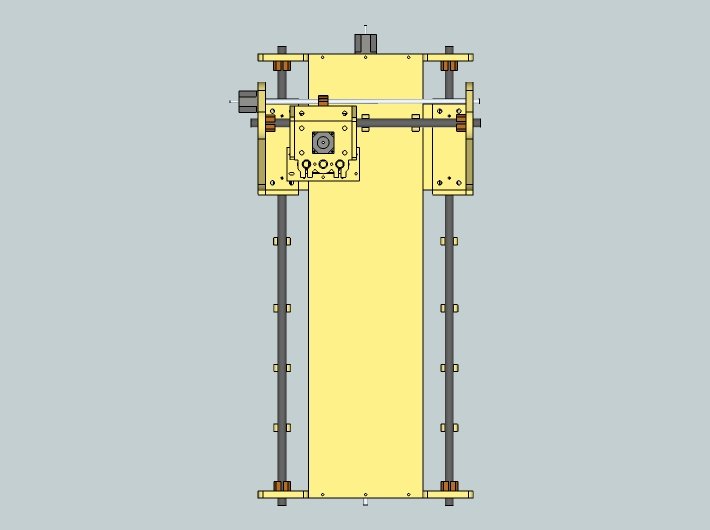
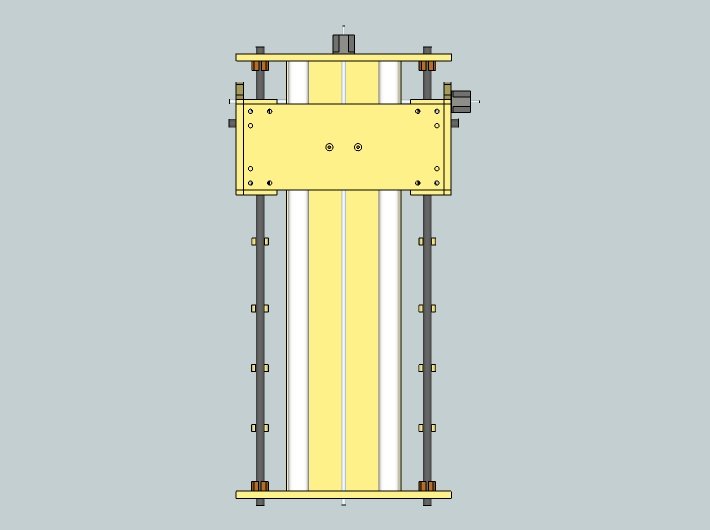
Here are some more static images to help complete the picture.


This looks like a ton of work. So happy to hear you were able to create the model in Sketchup, which I am learning also. The rail system on your design looks infinitely more sturdy than the chain-driven system I have on my router. Great work and I will visit your site often to see how things are going.
Pingback: New Machine Build DIY router 2X4 fun - CNCzone.com-The Largest Machinist Community on the net!
Niceeeeeeeeeeeeeeeeeeeeeeeeeeeeeeeeeeeeee!
Hi,
Do you have any idea of the jogging speed you can reach with this desing?
Thanks
Well on the preceding 2×4 design that this based on, I was only able to get a reliable 36 ipm from 10tpi screws using DIY lead nuts, bit I did not speend too much time trying to improve upon that. I may opt for some better screws on the smaller machine I am assembling right now to see what it can do, I’ll let you know what I find out. In my mind there is no reason why this machine should not be able to do as well as Joe’s 2006 Model in the speed department.
Hi,
Do you have dxf files you can share?
Nice work.
Joey
Thanks. Not sharing the DXF files quite yet, still assembling the first machine, I want to make sure it all works first. Hopefully I will make some progress this weekend… Do you have access to a machine to cut the parts out? I can’t I imagine trying to cut it out by hand.
Pingback: grumpygeek.com » Blog Archive » Let it Begin… Let it Begin!!!
Pingback: Need Help! What CAM or CAD software - CNCzone.com-The Largest Machinist Community on the net!
Pingback: New Machine Build my new MDF project - CNCzone.com-The Largest Machinist Community on the net!